Perfect Vanilla Pudding

Vanilla Pudding
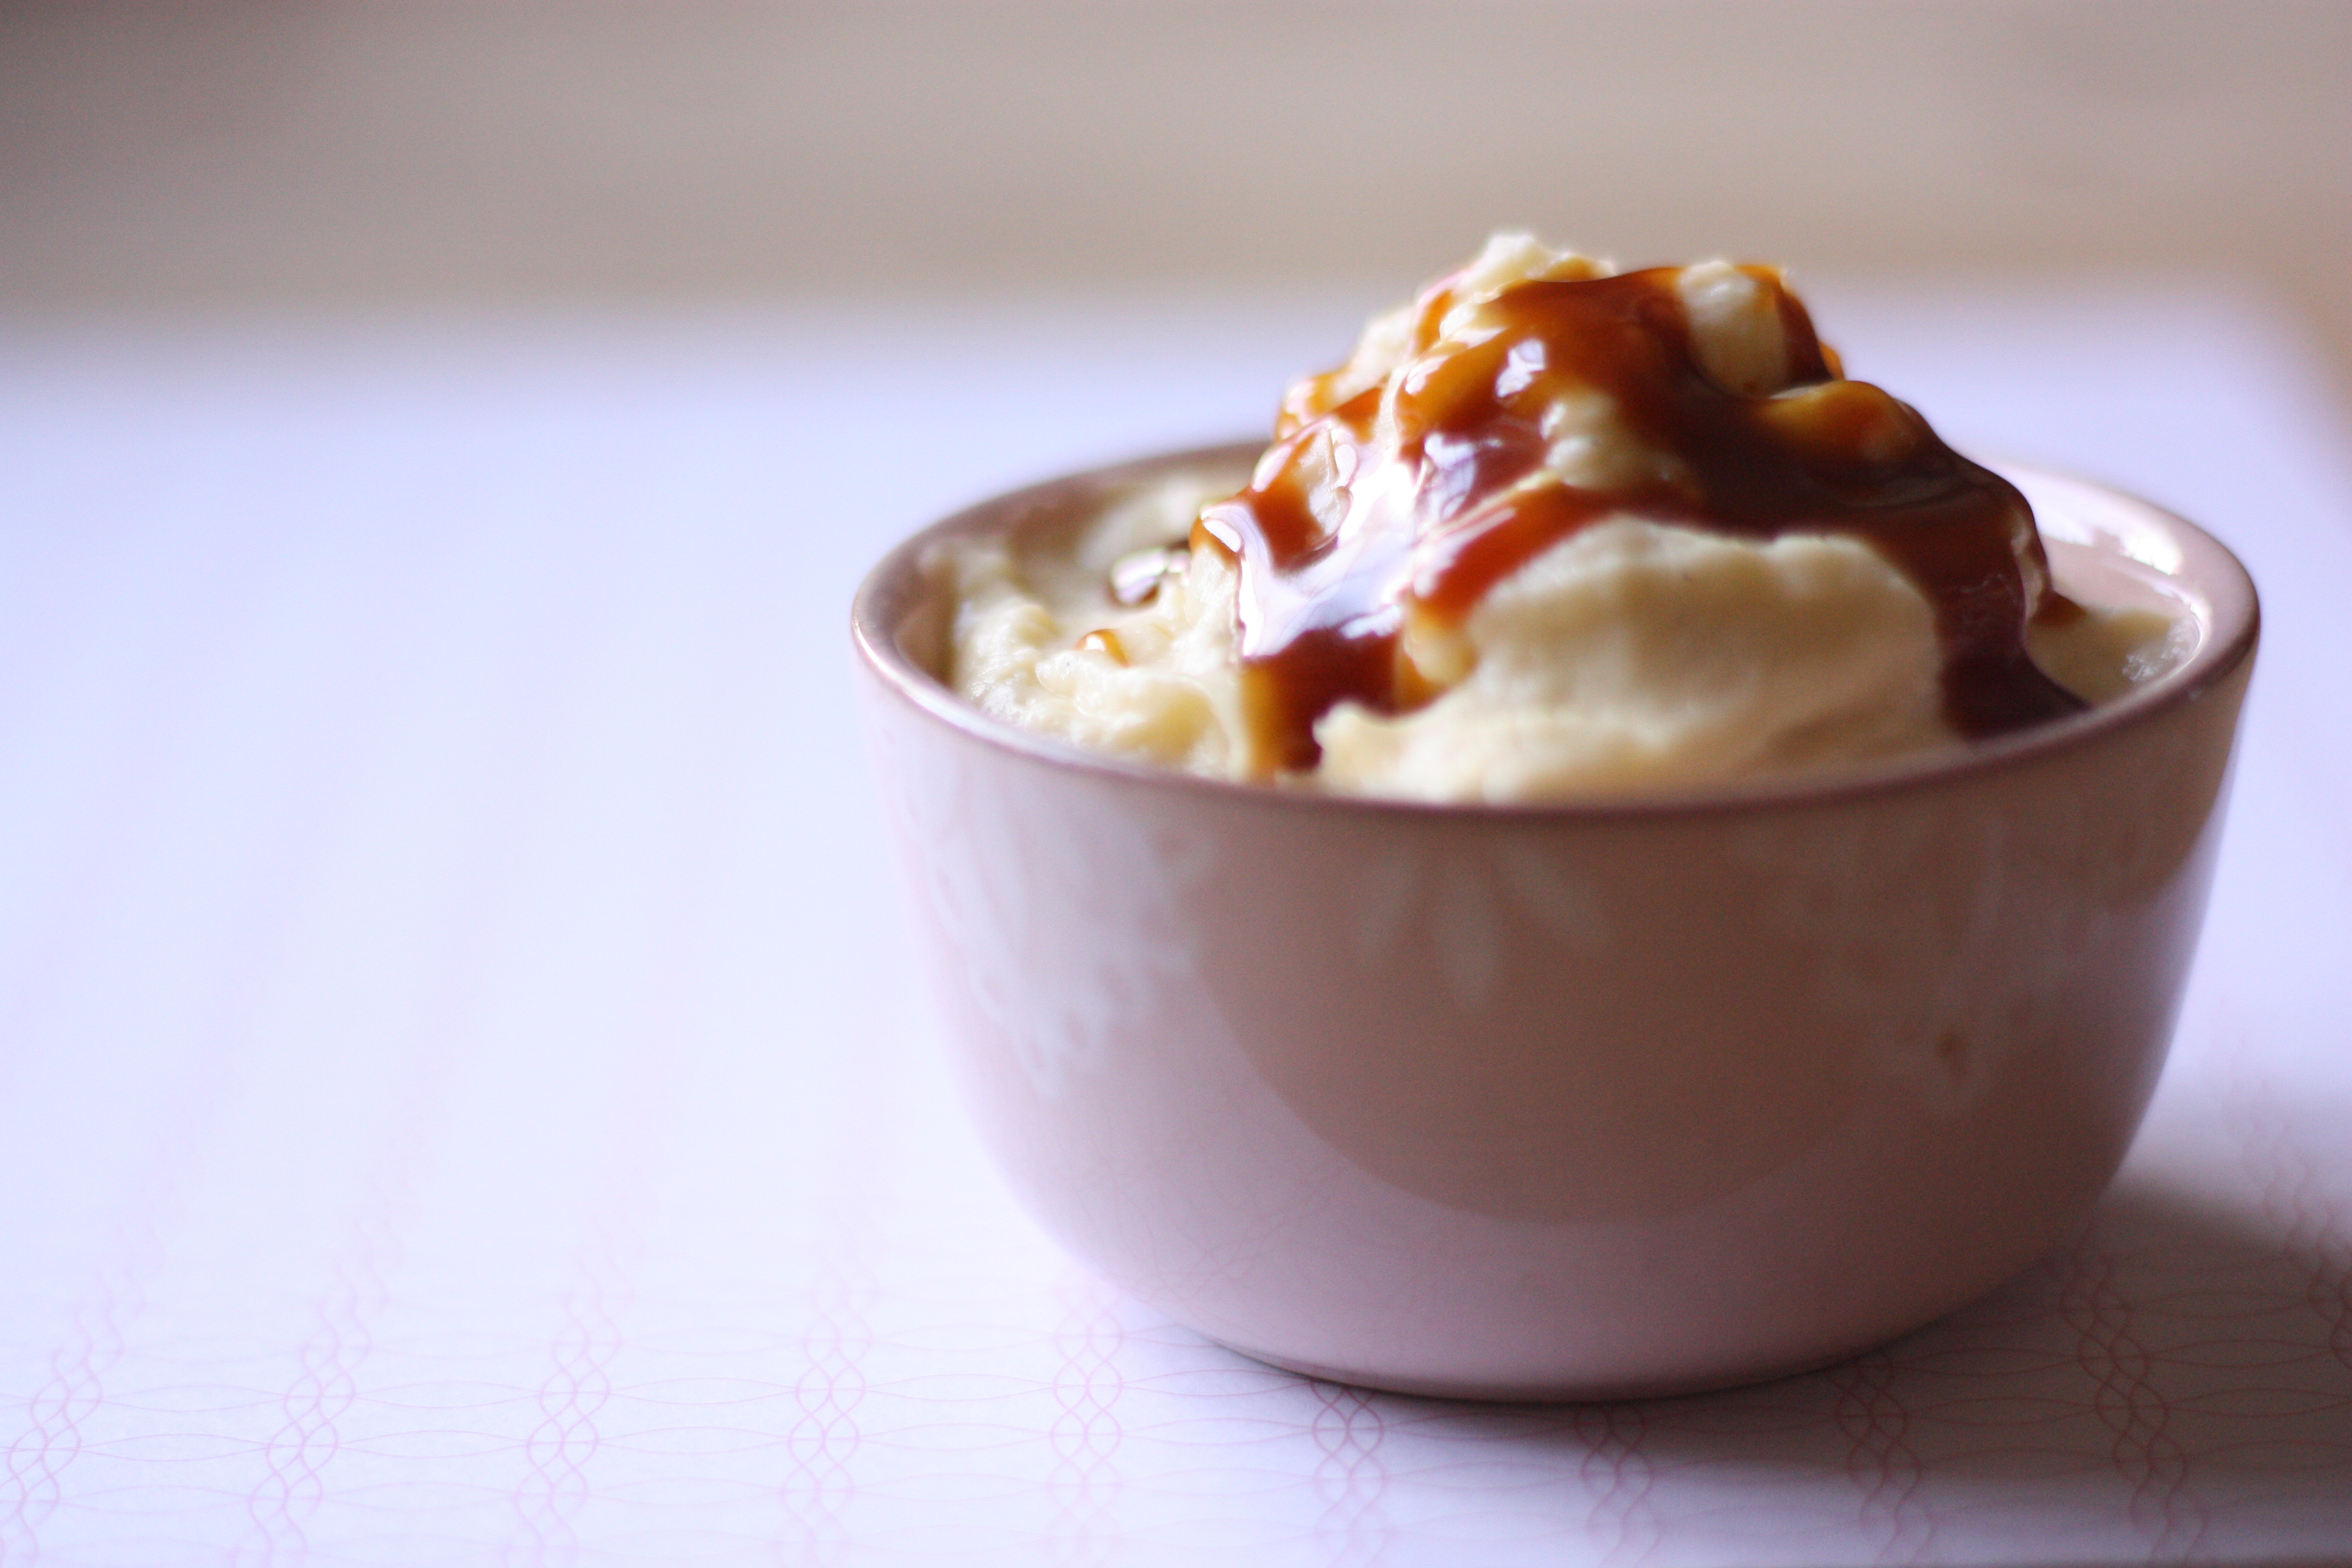
So, I actually prefer vanilla flavors over chocolate, but it seems like chocolate usually dominates, and it is also admittedly tricky to find really great vanilla flavors that don’t rely heavily on processed-typed additives. So, I actually haven’t ever found a vanilla pudding that I loved, even though I have many chocolate or butterscotch recipes that are terrific. Needless to say, I was thrilled to try and love this recipe from a sweet Chronicle cookbook called Puddin’ by Clio Goodman, based on a cafe of sorts (i’m guessing) in NYC. This is a great recipe, and yes, we did put salted caramel sauce on top of it!

Vanilla Pudding

2 1/2 c. whole milk
2 1/2 c. heavy cream
1 vanilla bean, split, seeds scraped out and reserved
1 c. sugar
6 T. cornstarch
6 egg yolks (for something to do with the whites, try macarons!)
1/4 t. salt
2 t. vanilla extract

In a medium saucepan, heat the milk, cream, and vanilla bean and seeds until steaming but not boiling. Remove from heat and allow to steep 30 minutes. Chill completely in fridge, 1-2 hours. (I skipped the fridge part, being impatient.)

Add sugar, cornstarch, egg yolks, and salt to saucepan and whisk vigorously.

Place pot over medium-high heat and cook, whisking constantly, until mixture begins to thicken, 5-6 minutes. (Once you can lift the whisk from the pudding and it leaves a faint shadow, it’s done. Pudding will seem fairly loose, but it will thicken up further as it chills.)

Strain the pudding through a fine-mesh sieve into a bowl, pressing pudding through sieve with a silicone spatula. Whisk in vanilla extract.

Cool at room temperature for 10 minutes, press a layer of plastic wrap onto the surface of the pudding, and chill completely in fridge, 2 hours.

Vanilla Pudding 2

Peanut Butter Toffee Cookies

Peanut Toffee Cookies
This is another of Alice Medrich’s terrific cookies in her Chewy, Gooey, Crispy, Crunchy cookie book that I’m so fond of. I made these at Christmastime, and loved them, though they are admittedly not the most usual cookie for holiday treats. All that aside, I’m very glad to have discovered this recipe, and my sons are very glad that I started buying toffee peanuts. With or without the cookies.

A small note: these cookies look picture-perfect out of the oven, but are quite prone to crumbling, especially when stacked.  For best appearance, keep them stored in an airtight container, just one layer deep, if it actually comes to that!

Peanut Butter Toffee Cookies
Yield 15-18 Cookies

8 T. (113 grams) unsalted butter, melted and warm
1/2 c. (100 grams) light or dark brown sugar
1/2 c. (100 grams) granulated sugar
1 c. (255 grams) natural (the kind that is unsweetened and requires stirring) chunky peanut butter, well-stirred to blend in the oil before measuring
3/4 t. salt
1/2 t. baking soda
1 t. pure vanilla extract
large egg
1 1/3 c. (170 grams) unbleached all-purpose flour
1 1/4 c. (140 grams) purchased coconut toffee peanuts or toffee peanuts, coarsely chopped
Flaky sea salt for sprinkling (optional)

In a large bowl, combine the melted butter, brown sugar, granulated sugar, peanut butter, salt, baking soda, vanilla, and egg. Whisk until thoroughly blended. Add the flour and mix with a rubber spatula or wooden spoon just until evenly incorporated.

Cover the dough and refrigerate for an hour or two, or up to 2 days.

Position the racks in the upper and lower thirds of the oven and preheat the oven to 325° F. Line two baking sheets with parchment paper.

Pour the chopped nuts into a shallow bowl. Scoop about 2 level teaspoons of dough for each cookie, shape into a 1-inch ball or a fat little log, and coat the top and sides heavily with the chopped nuts, pressing in any pieces that fall off so that there are no bald spots. Place 2 inches apart on the lined baking sheets. If you like, sprinkle each cookie with a very tiny pinch of crushed flaky sea salt.

Bake the cookies until they are lightly colored on top (and underneath), 15 to 18 minutes, rotating the sheets from top to bottom and front to back halfway through baking. The cookies will seem very soft to the touch, but they will firm up as they cool. Set the baking sheets on a rack to cool completely. Cookies can be stored in an airtight container for at least 2 weeks.

On the Go Morning Muffins

Good Morning Muffins from Flour

My jaw kind-of dropped the first time I read this recipe: zucchini, apples, coconut, pecans, raisins, oats and wheat bran! What wasn’t in this muffin? And could it really taste okay? And would any of my kids eat it? Well, I was pleasantly surprised by this success–it’s feels so satisfying to place all of these powerhouse ingredients together, and then for it to turn out beautifully. I enjoy them, and so do, well, two of my kids. That’s not bad success around here. The other great plus to these muffins: they stay soft for days, even though they tend to shrink down into their wrappers a bit. I wish I had the wherewithal to bake a batch of these every week! This recipe comes from the Flour cookbook. The recipe says it yields 12 muffins, but it works out to be more like 18 for me.

Good Morning Muffins

1/4 c. wheat bran
1/2 c. hot water
1 small zucchini, grated (about 1-1/2 c. packed)
1/2 c. raisins
1/2 c. pecan halves, roughly chopped, toasted
1/2 c. sweetened flaked coconut
1 apple, peeled, cored, and chopped (about 1 c.)
2/3 c. packed light brown sugar
3 eggs
3/4 c. canola oil
1 t. vanilla extract
1 1/2 c. unbleached all-purpose flour
3/4 c. old-fashioned rolled oats (not instant or quick cooking)
2 t. baking powder
1/2 t. kosher salt
1/2 t. ground cinnamon

Position a rack in the center of the oven, and heat the oven to 350 degrees F. Butter a standard 12-cup muffin tin, cot with nonstick cooking spray, or line with paper liners.

In a medium bowl, stir together the wheat bran and hot water until the bran is completely moistened. Add the zucchini, raisins, pecans, coconut, and apple and stir until well mixed.

Using a stand mixer fitted with a whip attachment, beat together the sugar and eggs on medium speed for 3 to 4 minutes, or until the mixture thickens and lightens. (If you use a handheld mixer, this same step will take 6 to 8 minutes.) On low speed, slowly drizzle in the oil and then the vanilla. Don’t pour the oil in all at once. Add it slowly so it has time to incorporate into the eggs and doesn’t deflate the air you have just beaten into the batter. Adding it should take about 1 minute. When the oil and vanilla are incorporated, remove the bowl from the mixer stand.

In a medium bowl, stir together the flour, oats, baking powder, salt and cinnamon until well mixed. Add the flour mixture to the egg mixture and fold carefully just until the dry and wet ingredients are well combined. Then add the bran mixture and fold again just until well combined. Spoon the batter into the prepared muffin cups, dividing it evenly and filling the cups to the rim (almost overflowing.)

Bake for 35 to 45 minutes, or until the muffins are lightly browned on top and spring back when pressed in the middle with a fingertip. Let cool in the pan on a wire rack for 20 minutes, then remove the muffins from the pan.

The muffins taste best the day you bake them, but they can be stored in an airtight container at room temperature for up to 3 days. If you keep them for longer than 1 day, refresh them in a 300 degree F oven for 4 to 5 minutes. Or, you can freeze them, wrapped tightly in plastic wrap, for up to 1 week, reheat, directly from the freezer, in a 300 degrees F oven for 8 to 10 minutes.

A Yummy Easy Spinach Dip

Spinach Dip

I’ve found myself making this recipe perhaps three times in the last two weeks! I’m just loving having it on hand to dip veggies or crackers or bread (or my finger) in. Super quick, super yummy, and super worth having around. This recipe comes from the Make- Ahead Appetizers book by America’s Test Kitchen.

Herbed Spinach Dip

10 oz frozen chopped spinach (I used about 8 cups fresh, and blanched it first)
1/2 c. mayonnaise
1/2 c. sour sream
2 T. chopped shallots
1 T. chopped fresh dill leaves
1/2 c. packed flat-leaf parsley leaves
1 small garlic clove, minced
1/4 t. Tabasco
1/2 t. salt
1/4 t. pepper
1/2 medium red pepper, chopped (or yellow, which is what I had on hand)

Add all ingredients to a food processor and process until well combined, about 1 minute. Transfer to serving bowl and chill for at least 1 hour. Really, it’s that easy!

A New Fave: My Ginger Cookie

medrich ginger cookie
I could probably attach the title “new fave” to almost every cookie in Alice Medrich’s Chewy, Gooey, Crispy and Crunchy book, because everything I have tried is simply fantastic. But this ginger cookie is terrific, and has a different place in my reportoire than the Best Recipe’s, though I love that one too (see Molasses Spice Cookies). After a conversation I had tonight with my friend Rachel, I realized I had never posted this recipe, and it was high time! especially since winter is feeling close to over here in the Rocky Mountains and these cookies just epitomize an afternoon with a cold chill in the air. These are also a favorite (surprisingly to me!) of, I think, two of my kids, Henry and Peter. Incidentally, this recipe works fantastically at high altitudes, too.

My Ginger Cookies

  • 2 c. (9 ounces) unbleached all-purpose flour
  • 2 t. baking soda
  • 2 t. ground ginger
  • 1 ½ t. ground cinnamon
  • ½ t. ground allspice
  • ¼ t. salt
  • 8 T. (1 stick) unsalted butter, melted and still warm
  • ¼ c. unsulfured mild or full-flavored molasses (not Blackstrap)
  • ½ c. (3.5 ounces) granulated sugar
  • 1/3 c. (2.33 ounces) packed brown sugar or light muscovado sugar
  • 2 T. finely minced fresh ginger (I omit this; it’s too much for my little ones!)
  • 1 large egg
  • ¾ c. (4 ounces) ginger chips or crystallized ginger, cut into ¼ -inch dice
  • About ½ c. (3.5 ounces) Demerara or turbinado sugar or ¼ c. (1.75 ounces) granulated sugar for rolling

Preheat the oven to 350°F. Position racks in the upper and lower thirds of the oven.

Combine the flour, baking soda, ground ginger, cinnamon, allspice, and salt in a medium bowl and mix thoroughly with a whisk.

Combine the warm butter, molasses, sugars, fresh ginger, and egg in a large bowl and mix thoroughly. Add the flour mixture and ginger chips and stir until incorporated. The dough will be soft.

Form the dough into 1-inch balls (0.5 ounce dough for each). Roll the balls in the Demerara sugar and place them 2 inches apart on the lined or ungreased cookie sheets. Bake for 10 to 12 minutes, or until the cookies puff up and crack on the surface and then begin to deflate in the oven. Rotate the sheets from top to bottom and from back to front halfway through the baking time to ensure even baking. For chewier cookies, remove them from the oven when at least half or more of the cookies have begun to deflate; for crunchier edges with chewy centers, bake for a minute or so longer.

Ciabatta

ciabatta paul hollywood
I’ve been watching PBS’s Best British Baking Show, and I was surprised to learn that I have a baking book from one of the host’s, Paul Hollywood. I got this book years ago, and I’ve actually not used it much, but decided to pull it out and take a look. On the show, the contestants made Hollywood’s ciabatta, but it certainly wasn’t the recipe I have, since I think they only gave them 4 hours to complete it. Four hours to get good rise and develop flavor and nicely sized air-pockets? Doesn’t seem possible to me. On the other hand, the recipe in his cookbook seemed way more legit: nice rise times, time to develop flavor, etc. Plus, it works so perfectly for my day’s schedule and it doesn’t take long to bake. It’s also a great bread for mingles and parties, because it’s quite short and squatty (think, bruschetta). The timeline for me is that I start it at 7:30 a.m., and it’s usually done about 5:00, right in time for dinner. I think I’ve made it 8 times in the last 3 weeks, and usually all four loaves are gone by the next morning! This recipe comes from 100 Great Breads. 

Ciabatta

4 c. flour, divided
1 1/2 c. tepid water, divided
1/2 c. sourdough starter or  2 1/4 t. instant yeast (I think. I’ve only tried this with my starter, so this might need a little adjusting, but this is the amount Hollywood suggests in his book)
1 T. salt
2 T. olive oil

1.(7:30 a.m.) In a bowl, combine a scant 2 c. flour with a generous 3/4 c. water and the yeast or starter. Whisk for five minutes. The wetter, the better, so add a tablespoon or two of water if the dough is dry. Cover with plastic wrap and set aside for 4 hours.

2. (11:30 a.m.) Add the remaining 2 c. flour, 3/4 c. water, salt and olive oil. Whisk again for five minutes. Cover and set aside for 2 hours.

3. (1:30 p.m.) Gently tip the dough onto a floured surface and cut it in half with a sharp knife or pastry cutter. Loosely shape each half into a long rectangle. Dust with flour, then spray a piece of plastic wrap with nonstick spray and place loosely on top of the two rectangles. Let rest for 1 hour.

4. (2:30 p.m.) Prepare two baking sheets with parchment paper. Cut each rectangle into 2 pieces again (so you now have 4 rectangles), and gently pull them, and then place two of the loaves onto each of the prepared baking sheets. They should be approximately 8 inches long by 3-4 inches wide. Don’t shape any more than necessary to keep the air inside the dough. Cover again with greased plastic wrap and let rest another hour.

5. (3:30-4:00 p.m.) Twenty minutes before baking, preheat the oven to 400 degrees F. Remove plastic and dust the loaves with flour. Bake for about 30 minutes on the upper and lower thirds of the oven, switching halfway through. Remove when browned on top and bottom and let cool on a rack before serving.

Candied Orange Peel

candied orange peel
I’ve tried a few recipes for candied orange peel, and this is the one I like the best. It’s simple and it’s consistently good, though I have to admit I slightly botched it this last time, which is unfortunate since the photo is of this time. You’ll note the extra sugar on the orange peels–I let it go a second too long, and I must have had some sugar in the pot that hadn’t dissolved, hence my small problem. Luckily, it still tastes fine. This recipe comes from a great little book called Brittles, Barks, and Bonbons. Some more reasons I love making candied orange peel: you’re making something out of a product you would otherwise throw away, it can be stored for a long, long time in your fridge, and then I can make my favorite chocolate bark (see my last post). Win win, win.

Candied Orange Peel

5 medium navel oranges, preferably organic (you might also want to try a mix of grapefruit and lemon peels, too)
1 1/2 cups sugar
1 1/2 cups water

1. Scrub the oranges. Slice the stem end off the orange and place the cut end on a cutting board. Make vertical cuts, about 1 inch apart, all the way through the peel. Carefully peel off the scored sections of rind. With a sharp paring knife, trim away as much of the white pith from the peel as you can. Cut each portion of peel lengthwise into 1/4-inch-wide strips.

2. Place the orange peels in a small pan and add enough cold water to cover. Bring to a simmer and cook for 20 minutes. Drain the peels and set aside.

3. Place the pan over medium-low heat and add the 1 1/2 cups each sugar and water. Stir until the sugar is dissolved. Add the orange peels to the simple syrup and simmer gently, stirring occasionally, until they are soft and translucent, about 40 minutes.

4. Place a wire cooling rack over a rimmed baking sheet lined with wax paper. Use a slotted spoon or tongs to transfer the peels to the rack. Let stand until still slightly tacky but almost dry, about 1 hour.


Candied Orange & Hazelnut Bark

Orange Hazelnut Bark

When I made holiday treats this year, I made a huge batch of candied orange peel, hoping to make panettone and other traditional breads. Well, all those breads never happened, leaving me with a good-sized amount of candied orange peel, which we enjoy on its own, a bit, but when I threw it on this bark I was making, we loved it. This simple candy has been repeated I think three times in the last couple weeks, and I can’t get enough. It takes about 20 minutes to put together, and then it’s pretty and delicious and has interesting flavors. I made it for book group and for a little gathering of friends, and it’s disappeared first of everything, both times. Definitely delicious.

Candied Orange & Hazelnut Bark 

8 oz. dark chocolate, my favorite are the semi-sweet bars of chocolate at Trader Joe’s, bought in one pound sizes
1/3 c. candied orange peel (I’ll post my favorite recipe, if you’ve never tried it)
1/3 c. hazelnuts
2 pinches of fleur de sel or sea salt

Preheat the oven to 350. Lay the hazelnuts on a baking sheet lined with aluminum foil. Line another baking sheet with parchment paper and set aside for the chocolate. Once the oven is preheated, toast the nuts until fragrant and lightly browned, about 8-10 minutes. Let cool and then chop coarsely. Set aside.

Meanwhile, finely shave the chocolate with a knife. In a small glass or plastic bowl, melt half of the chocolate in the microwave at 30 seconds. Remove and stir as long as you can. If the chocolate doesn’t continue to melt as you stir, microwave it again for 20 seconds. Then, remove and stir until smooth.

Add a handful of the reserved chocolate shavings and stir until incorporated. Repeat until you have used all the shaved chocolate. It should take you about 5-10 minutes to add and stir. (This is one method of tempering chocolate. There’s a couple of ways to do this, so if you don’t like this one, just google another way!) By the time all of the chocolate is incorporated, your chocolate should be about 90-91 degrees, which is tempered. If you want to skip this all and quickly melt all your chocolate, the chocolate will taste fine, but could have white streaks or bubbles on the surface.

Pour the tempered chocolate onto the parchment-lined sheet and spread with a spatula to a thickness of about 1/4″ inch deep. Working quickly, sprinkle first the nuts, then the candied orange peel, and then the salt over the surface of the chocolate. Either set aside at room temperature or in the fridge to harden. When ready to serve, break the bark into wrist-sized portions. Can keep for 2 weeks in a airtight container, but mine has never lasted longer than one evening!

Baked’s Pumpkin Bread

Pumpkin Bread Baked

I know there are a million recipes for pumpkin bread, but I will add this one to the internet on account of a request. This recipe comes from the cookbook Baked: New Frontiers in Baking, and there are many winners in this book, especially when it comes to cakes, but this is a great recipe, too. Sorry to my cousin that it has taken me so long to post it! I’m just getting back to life, post holidays, vacation, sick kids, etc. I love the Joy of Cooking’s recipe for pumpkin bread as well; any pumpkin bread is great to have around for the weekend.

Pumpkin Chocolate Chip Loaf

3 1/4 c. all-purpose flour (you can substitute 1 c. whole wheat, if desired)
2 t. ground cinnamon
1/2 t. ground nutmeg
1/2 t. ground allspice
1/2 t. ground ginger
2 t. baking soda
2 t. salt
1 3/4 cups pumpkin puree (a 15-ounce can)
1 c. vegetable oil
3 c. sugar
4 large eggs
1 t. pure vanilla extract
1 1/2 c. (12 ounces) semi- or bittersweet chocolate chips

Preheat the oven to 350 degrees. Grease and flour (or line with parchment paper) 2 9×5×3-inch loaf pans.

In a large bowl, whisk together the flour, spices, baking soda and salt.

In another large bowl, whisk together the pumpkin puree and oil until combined. Add sugar and whisk again.
Whisk in the eggs one at a time, then add the vanilla. Fold the dry ingredients into the wet ingredients, until just mixed, then add the chocolate chips and briefly stir again. Spread the batter into the prepared pans, and gently knock the bottom of the pan onto the countertop to even out the batter. Use a spatula to smooth the top.

Bake in the center of the oven until a toothpick comes out clean, about 75 to 90 minutes, rotating pans halfway through. Cool on a wire rack for 15 minutes before inverting the loaf onto the rack to cool completely before serving. The loaf will keep for 3 days or more wrapped in plastic wrap or in an airtight container at room temperature.

Makes 2 9×5×3-inch loaves

Egg Nog Fudge

KAF photo!

KAF photo!


I loved this last year! Can’t wait to make it again for our treat-giving. This recipe is from King Arthur Flour.

Egg Nog Fudge

2 1/4 c. sugar
1/4 c. corn syrup
1 3/4 c. heavy cream
7 T. unsalted butter
1/4 t. salt
1/2 t. eggnog flavor (I found this at a specialty shop, like Orson Gygi in Salt Lake City)
1/2 t. nutmeg
1 1/2 c. chopped white chocolate, or white chocolate chips

1) Grease a 9″ square cake pan with parchment; grease the parchment. 

2) Combine the sugar, corn syrup, cream, butter, salt, eggnog flavor, and nutmeg in a deep, narrow (6- to 8-quart) heavy-bottomed pot.

3) Bring the mixture to a boil over medium-high heat, stirring until smooth — the sugar should have dissolved, with no grittiness in the bottom of the pan.

4) Boil until the mixture reaches 235°F to 240°F on a candy or digital thermometer, about 15 to 20 minutes. (Remember, 2 degrees lower for every 1000 feet above sea level, if this applies to you. I’m at an altitude of 4500 ft, so I want to only boil to 226-231 degrees F).

5) Remove the pot from the heat and add the chocolate a handful at a time, stirring until smooth. Note: As soon as the chocolate has melted, stop stirring! If you continue to stir, it’ll separate and become grainy.

6) Pour the mixture into the parchment-lined pan — you’ll want to do this fairly quickly, as once it starts to cool, the fudge will be much harder to pour.

7) Cool the fudge overnight, until firm. If it’s in a large pan, cut it into serving-size pieces. Wrap airtight, and store at room temperature for several days.

Yield: about 64 pieces