Coconut Buns

I do a lot of practical baking, but then I sometimes see these recipes that are purely for pleasure and they look so enticing, and I’m so curious about how they will turn out that I can’t shake it out of my head until I make it. This is one of those. I was collecting recipes for a class I was teaching when I came across it, and I had never heard or thought of this idea–a cinnamon bun with a coconut mixture. But it sounded so great, and really, after making it, it was so great. So, here’s a fun way to spend a weekend morning if you find yourself being a little homebound lately! I found the recipe in a Bake Magazine from Spring 2018.
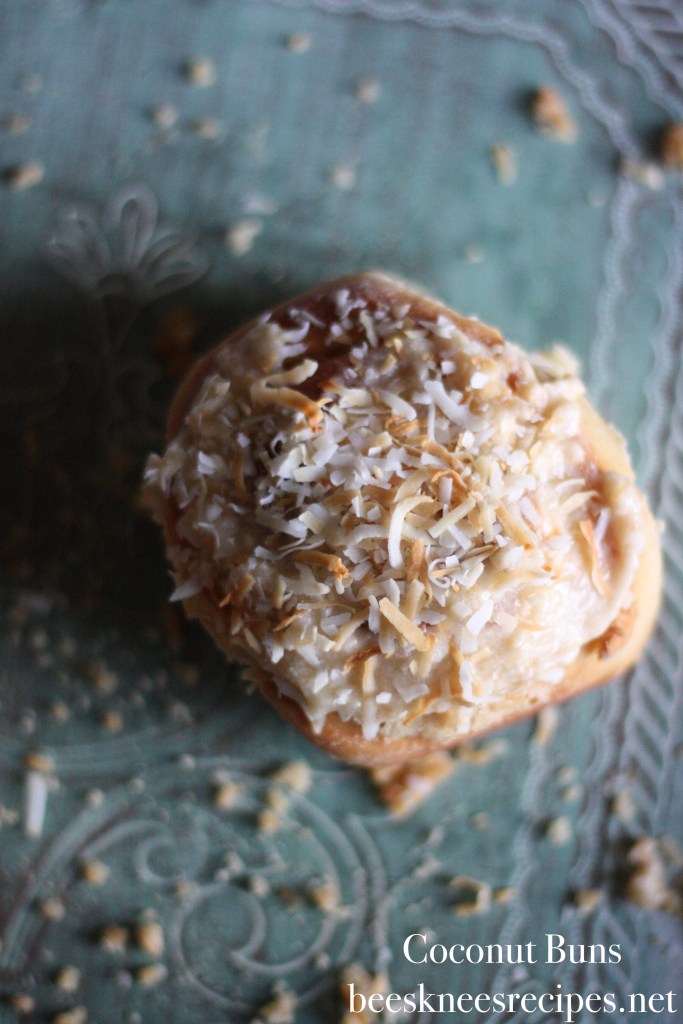
Coconut Buns 
Makes 12
Recipe by Ben Mims

  • 1¼ c. (300 grams) warm unsweetened canned coconut milk (120°F/48°C to 130°F/54°C)
  • ⅓ c. (67 grams) granulated sugar
  • 2 T. (28 grams) unrefined coconut oil, melted
  • 1 t. (3 grams) kosher salt
  • 1 large egg (50 grams), lightly beaten
  • 4 c. (500 grams) all-purpose flour (I replaced 1 1/2 c. with whole wheat)
  • 1 (0.25-ounce) package (7 grams) instant yeast (2 1/4 t.)
  • ½ c. (25 grams) unsweetened coconut flakes
  • Coconut Filling (recipe follows)
  • Coconut Icing (recipe follows)
  1. In the bowl of a stand mixer fitted with the dough hook attachment, combine warm coconut milk, sugar, melted coconut oil, salt, and egg. Add flour and yeast, and beat at low speed until a dough forms. Increase mixer speed to medium, and knead until smooth, about 8 minutes. Cover with plastic wrap, and let rise in a warm, draft-free place (75°F/24°C) until doubled in size, about 1½ hours.
  2. Preheat oven to 350°F (180°C). Spread coconut flakes on a baking sheet, and bake, stirring halfway through, until lightly golden brown, about 8 minutes. Transfer coconut to a bowl, and let cool completely. Lightly grease a 13×9-inch baking pan with butter.
  3. Transfer dough to a lightly floured surface. Roll into an 18×12-inch rectangle. Spread Coconut Filling over dough, leaving a ½-inch border on one long side. Starting with opposite long side, roll dough into a tight log. Trim ends, and cut into 12 rounds. Transfer rounds, cut side up, to prepared pan, and cover with plastic wrap. Refrigerate for at least 8 hours or overnight (or let rolls rise at room temperature for 1½ hours).
  4. Preheat oven to 375°F (190°C).
  5. Uncover rolls, and bake until puffed and golden brown throughout, about 35 minutes. Let cool for 10 minutes. Drizzle with Coconut Icing while still warm, and sprinkle with toasted coconut flakes before serving.

Coconut Filling

  • 1 c. (84 grams) finely shredded dried (desiccated) coconut
  • 1 c. (227 grams) unsalted butter, softened
  • ½ c. (110 grams) firmly packed light brown sugar
  • 3 c. (360 grams) confectioners’ sugar, sifted
  • 1 t. (4 grams) coconut extract
  • 1 t. (4 grams) vanilla extract
  • ½ t. (1.5 grams) kosher salt
  1. Preheat oven to 350°F (180°C). Spread coconut on a baking sheet, and bake, stirring halfway through, until lightly golden brown, about 8 minutes. Transfer to a bowl, and let cool completely.
  2. In the bowl of a stand mixer fitted with the paddle attachment, beat butter and brown sugar at medium speed until smooth, about 2 minutes. Add confectioners’ sugar, extracts, and salt; beat until smooth. Reserve ½ cup filling for Coconut Icing. Stir toasted coconut into remaining filling. Cover with plastic wrap until ready to use.

Coconut Icing

  • ½ cup Coconut Filling (recipe precedes)
  • 2 tablespoons (30 grams) unsweetened canned coconut milk
  1. In a small bowl, stir together Coconut Filling and coconut milk. Cover with plastic wrap until ready to use.
Advertisement

Cardamom Berry Braid

I pulled this recipe from last year’s Bake from Scratch, holiday edition, and I wanted to make it based solely on its appearance. It’s absolutely stunning. The original recipe calls for  a homemade cranberry filling, but going with the Scandinavian flavors here, I opened a bottle of nice lingonberry jam instead. I liked the flavors tremendously, and I liked saving myself a step, too. I really recommend following suit! I also made a big batch of candied orange peel for the Christmas season, so I used that as well, but if you aren’t inclined to make your own, a purchased one could also work, as could just the zest of an orange grated into the jam. I ended up serving this bread Christmas morning (I baked it a few days in advance, froze it, defrosted it overnight, and then warmed it the morning of Christmas in the oven). I loved this bread (I ate it over the Christmas Kringle we had), and I hope to make it for many years to come. It also got the distinguished title from my father-in-law as “the best thing you’ve ever made.” Has a nice sound to it, doesn’t it?

Cardamom Berry Braid

  • ¾ c. (180 grams) whole milk
  • ½ c. (100 grams) granulated sugar
  • ¼ c. (57 grams) unsalted butter, cubed and softened
  • 1½ t. (4.5 grams) kosher salt
  • ½ c. (120 grams) warm water (105°F/40°C to 110°F/43°C)
  • 1 T. (6 grams) instant yeast
  • 2 large eggs (100 grams)
  • 5½ c. (688 grams) all-purpose flour
  • 1 t. (2 grams) ground cardamom
  • Lingonberry Jam or Cranberry Filling (recipe below)
  • Storebought or Homemade Candied Orange Peel, diced
  • Vanilla Glaze (recipe below)
  1. In a small saucepan, bring milk to a boil over medium heat. Remove from heat; add sugar, butter, and salt, stirring until completely incorporated. Set aside until cooled to 120°F (49°C) to 130°F (54°C).
  2. In the bowl of a stand mixer fitted with the dough hook attachment, combine ½ cup (120 grams) warm water and yeast. Add warm milk mixture. Stir in eggs. With mixer on low speed, add flour and cardamom, beating until combined. Increase mixer speed to medium-low, and beat until smooth and elastic, 5 to 7 minutes. Spray a large bowl with cooking spray. Place dough in bowl, turning to grease top. Cover directly with plastic wrap, and let rise in a warm, draft-free place (75°F/24°C) until doubled in size, about 1 hour.
  3. Line a large baking sheet with parchment paper.
  4. On a lightly floured surface, roll dough into a 24×12-inch rectangle. Spread Lingonberry Jam onto dough, leaving a ½-inch border on all sides. Sprinkle with diced Candied Orange Peel. Starting at one long side, roll up dough, jelly roll style; press edge to seal. Place on prepared pan.
  5. Using a serrated knife, cut roll in half lengthwise. With cut sides facing up, carefully twist dough pieces around each other. Form into a circle, pinching ends to seal. Cover loosely with plastic wrap, and let stand in a warm, draft-free place (75°F/24°C) for 30 minutes.
  6. Preheat oven to 350°F (180°C).
  7. Bake until golden brown and internal temperature registers 190°F (88°C), about 40 minutes. Let cool completely on a wire rack. Drizzle with Vanilla Glaze. Store in an airtight container at room temperature for up to 4 days.

Cranberry Filling (optional)

  • 1⅓ c. (171 grams) dried cranberries
  • ⅓ c. (67 grams) granulated sugar
  • 1 T. (14 grams) unsalted butter, cubed
  • ½ t. (1 gram) ground cardamom
  • ¼ t. ground cinnamon
  1. In a small saucepan, bring cranberries and water to cover by 1 inch to a boil over high heat. Reduce heat to low, and cook until cranberries are softened, about 20 minutes. Drain cranberries, reserving 2 tablespoons (30 grams) cooking liquid.
  2. In the work bowl of a food processor, place warm cranberries, reserved 2 tablespoons (30 grams) cooking liquid, sugar, butter, cardamom, and cinnamon; pulse until mixture has the texture of jam. Let cool completely. Refrigerate in an airtight container for up to 1 week.

Vanilla Glaze

  • 1 c. (120 grams) confectioners’ sugar, sifted
  • ¼ c. (60 grams) heavy whipping cream
  • 1 t. (4 grams) vanilla extract
  • ½ t. (1.5 grams) kosher salt
  1. In a small bowl, whisk together all ingredients until smooth. Use immediately.

Cinnamon & Spice Oat Scones

These scones are probably one of the simplest and healthiest bakes I know. Really, they just change a bowl of oatmeal into a delicious portable snack. They aren’t that sweet, but I love them perfectly how they are and continue to make them frequently. I’ve noticed my kids will eat them, but not devour them, which is probably a good sign, really, that they are healthful and filling.

They also don’t have any wheat, if that’s a help to you, and they last for a couple of days, making a good on-the-go breakfast. They are from Genevieve Ko’s Better Baking, one of my favorite baking books on the shelf (and I won’t disclose how many that is!). She has a different title for them (she calls them oat soda bread scones), but I think my name better describes them and reflects the way I’ve spiced them.

oatmeal scones ko

Cinnamon & Spice Oat Scones

  • 2 c. old-fashioned rolled oats
  • one packet English breakfast tea leaves (original) or Bengal Spice herbal tea bag (my favorite!)
  • 1/2 c. raisins
  • 1/2 t. baking soda
  • 1/4 t. salt
  • 2 T. sugar (turbinado is good for sprinkling on top, if you have it)
  • 3/4 c. buttermilk
  1. Position a rack in the center of the oven and preheat to 400 degrees. Line a baking sheet with parchment paper (I own a scone pan, which I used for the image above. I got it from King Arthur Flour, if you’re looking).
  2. Process the oats and tea leaves in a food processor until finely ground; it’s okay if there are still some small bits of oats. Add the raisins and pulse until chopped. Add the baking soda, salt , and sugar and pulse to combine. Add the buttermilk and pulse until the dough comes together, scraping the bowl occasionally.
  3. Using a 3-T (2 in.) cookie scoop or a 1/4 c. measure, drop the dough by scant 1/4-cupfuls onto the prepared pan, spacing them 1.5 inches apart. Flatten the tops slightly with your palm, then slash a cross in the top of each with a sharp knife. Sprinkle with sugar.
  4. Bake until the scones are cooked through and the bottoms are light golden brown, about 15 minutes.
  5. Slide the parchment paper with the scones onto a wire rack to cool. Serve warm or at room temperature.

Sweet Cheese Strudel

This bread is our favorite Easter morning breakfast. In February, my oldest daughter Lucy usually starts asking me if I’ll make it this year for Easter, and she’s also been known to request it for her birthday. The original recipe comes from Beth Hensperger’s Bread for All Seasons. I’ve done everything here the same as the original, except sometimes I only use cream cheese (I don’t add the goat cheese), and I also braided this plait instead of rolling it like cinnamon rolls–and it turned out beautifully.

It’s a simple but dramatic loaf and one of the best ways to start any morning. I think perhaps tomorrow I’ll also add some blueberries into the filling–just a few! Oh, also note that it rests in the fridge overnight, so start the day before.

Sweet Cheese Strudel

Yeasted Sweet Cheese Strudel or  Cream Cheese Braided Danish

2 1/2 t. active dry yeast
1/2 c. sugar
1/2 c. warm water
1/2 c. sour cream
6 T. unsalted butter, at room temperature, cut into pieces
2 eggs
Grated zest of 1 large lemon
1 1/2 t. salt
3 1/4 c. unbleached all-purpose flour (exact measure)

Sweet Cheese Filling
8 oz. fresh goat cheese (not Feta! that rookie mistake was embarassing), at room temperature
8 oz. cream cheese, at room temperature [sometimes, I just use 16 oz. of cream cheese instead of goat cheese, and it is great either way]
2/3 c. sugar
1 egg
2 t. pure vanilla extract
Grated zest of 1 large lemon

Brandied Almond Crust
1 egg yolk
1 t. good-quality brandy [or almond extract]
2 T. light brown sugar
1/4 t. ground allspice
1/2 c. slivered or sliced almonds

1. In a small bowl, sprinkle the yeast and a pinch of the sugar over the warm water. Stir to dissolve. Let stand until foamy, about 10 minutes. Warm the sour cream on the stove top or in a microwave to about 105 degrees, then add the butter pieces. Stir to melt.

2. In a standing mixer (or equivalent), combine the remaining sugar, eggs, lemon zest, salt and 1 c. of flour. Add the warm sour cream and yeast mixtures. Beat until smooth, about 1 minute, switching to a wooden spoon as necessary if making by hand. Add the remaining flour, 1/2 c. at a time. The dough will be rather soft and have a silky, translucent quality. Scrape down the sides of the bowl with a spatula. Cover the bowl with 2 layers of greased plastic wrap and let rise in the fridge overnight.

3. The next day, make the sweet cheese filling. With an electric mixer, blend together the cheeses, sugar, egg, vanilla, and lemon zest until smooth and well combined. Cover and refrigerate until needed.

4. Using a large dough scraper, scrape the chilled batter onto a lightly floured work surface. Divide into 3 equal portions. Roll out each portion in to an 8-by-12-inch rectangle, dusting lightly with flour as necessary to prevent sticking. Spread each rectangle with one-third of the sweet cheese filling, leaving a 1/2-inch border around the edges. Starting from a long side, roll up jelly-roll fashion and pinch the seam together to seal. Pinch both ends to seal and tuck them under. (In the picture above, I spread the filling down the center and then cut the dough on both sides into one-inch strands, and folded them over each other to create the braid. I like the look much better.)

5. Place on a greased or parchment-lined baking sheet, at least 3 inches apart. Using a serrated knife, score each finished cylinder in 5 places across the top, no more than 1/4 inch deep. Cover loosely with plastic wrap and let rise at room temperature until doubled in volume, 45 minutes to 1 hour. Twenty minutes before baking, preheat the oven to 350 degrees.

6. Bake in the center of the preheated oven 10 minutes. Meanwhile, prepare the brandied almond crust. In a small bowl, combine the egg yolk, brandy, brown sugar, and allspice and beat briskly with a whisk. Using a pastry brush, spread the crust mixture gently over the tops of the partially baked strudels. Immediately sprinkle each strudel with one-third of the almonds. Quickly return the pan to the oven and bake until the strudels are golden, sound hollow when tapped, and a cake tester inserted into the center comes out clean, another 15-20 minutes. Using a spatula, carefully transfer the strudels from the baking sheet to a rack to cool completely. Enjoy!

Pear, Fig & Onion Quiche

IMG_2328

It’s been such a busy month, I haven’t had a second to breathe! Finally, though, middle school, elementary school, and now preschool have started, and I’m back to teaching at the university as well. That doesn’t sound like things are going to get less hectic! However, at least now there’s more of an enforced bedtime around here, and a chance to sit and look over what I’ve been wanting to post.

This recipe was an easy favorite of the last few weeks. I made it for a shower of a dear friend; it sounded like the perfect shower food, and perhaps a little too indulgent for just a weeknight meal. The recipe comes from Lebovitz’s My Paris Kitchen cookbook, but he titles it Pear and Blue Cheese Quiche. The blue cheese flavor was soooo mild, though, that I hardly think we need to mention it in the title, since it will turn away all those who think they hate the stuff, when they probably won’t be aware that it’s in there if they try it. So, I’ve retitled, and also added figs, simply because I could get them, and I don’t know of anything prettier on the top of a festive summer food.

Pear, fig & onion Quiche

Crust
1 c. (140g) all-purpose flour
1/3 c. (55g) cornmeal
1/2 t. sea salt or kosher salt
8 T. (4 ounces/115g) unsalted butter, cubed and chilled
1 large egg

Filling
1 T. olive oil
6 shallots, peeled and thinly sliced (I used two small red onions, hence the name!)
Sea salt and freshly ground black pepper
1 large, firm, ripe pear, peeled and diced into 1/2-inch (1.5cm) cubes
1 c. (130g) diced cooked (boiled) ham (or bacon, or omit for vegetarian)
1 1/2 c. (375ml) heavy cream or half-and-half
8 oz. (225g) cream cheese
Freshly grated nutmeg
4 large eggs
2 egg yolks
1 1/2 c. (150g) crumbled blue cheese or Roquefort (or goat cheese)
2 T. minced fresh flat-leaf parsley
1 T. fresh thyme (my addition)
2 fresh figs, sliced, for decoration (also my addition)

  1. To make the crust, in the bowl of a stand mixer fitted with the paddle attachment (or in a bowl, by hand with a pastry blender), combine the flour, cornmeal, and salt. Add the butter and beat on low speed until the butter is broken up and the mixture is sandy. Add the egg and mix until the dough begins to clump and come together. Use your hands to gather the dough and shape it into a disk. Wrap it in plastic and chill for at least 30 minutes. (The dough can be made up to 2 days in advance.)
  2. Roll out the chilled dough on a lightly floured surface until it’s 14 inches (35cm) across. Wrap aluminum foil around the outside of a 9- to 10-inch (23 to 25cm) springform pan to catch any leaks, and then transfer the dough to the pan. Press the dough against the side, allowing it to come a bit more than halfway up the sides of the pan. If there are any cracks, patch them with a bit of dough from the edges—you don’t want the filling to leak out during baking. Chill the dough in the pan while you make the filling.
  3. Preheat the oven to 375°F (190°C).
  4. To make the filling, heat the oil in a skillet over medium heat and cook the shallots with some salt and pepper until soft and translucent, 3 to 5 minutes. Remove from the heat and stir in the diced pear and ham.
  5. In a large bowl, blend together the cream, cream cheese, a few gratings of nutmeg, the eggs, and the yolks until smooth. Stir in the blue cheese, the pear and ham mixture, and the parsley and thyme.
  6. Set the springform pan on a rimmed baking sheet and pour in the filling, using a spoon to make sure the ingredients in the filling are evenly distributed. Please figs in a pattern on top, if using. Bake the tart for 45 to 50 minutes, until the top is lightly browned, the filling still jiggles, and a toothpick inserted into the center comes out clean. Let cool until firm enough to slice, then serve warm or at room temperature.

    Pear Fig Quiche

Buttery Blueberry Crumb Cake

Blueberry Crumb Cake

Smitten Kitchen is a wonderful blog, and although I’ve spent a little time exploring it, I’ve spent much more time looking at Deb Perelman’s cookbook of the same name, which has such terrific ideas and spins on tastes and flavors. Very inspirational. And of course, I’m right on board with her when it comes to baking. This is one of my favorite bakes from this cookbook. I made it last weekend for my sister’s baby blessing, and am happy to share the recipe here for those who were wanting it! Such a simple cake, but just delicious, and perfect for brunches or breakfast or dessert. Interestingly, this is not the same recipe that is on her blog! 

Buttery Blueberry Crumb Cake

Streusel
6 tablespoons (40 grams) all-purpose flour
2 tablespoons cornmeal
1/2 cup (100 grams) granulated sugar
1/4 teaspoon ground cinnamon
2 tablespoons unsalted butter, cold is fine
Pinch of salt

Cake:
1 cup all-purpose flour
1/2 cup cornmeal
2 teaspoons baking powder
1/2 teaspoon table salt
8 tablespoons unsalted butter, softened
1 cup (150 grams) granulated sugar
1/4 teaspoon lemon zest
2 large eggs
1/4 teaspoon vanilla extract
2 cups fresh blueberries, clean and dry
1/3 cup sour cream

Heat oven to 350°F. Butter a 8-inch square baking pan (with at least 2″ sides) and dust it lightly with flour, or line it with a round of parchment paper or spray with nonstick spray.

In a medium bowl, whisk flour, cornmeal, baking powder, and salt until combined, and set aside. In a mixing bowl, beat butter and sugar together until light and fluffy (about two minutes). Add eggs one at a time, then add the vanilla and the zest and beat until combined. Beat in 1/3 of the dry ingredient mixture until just combined, followed by all of the sour cream; repeat with another 1/3 of the flour, mix, and then combine the blueberries with the remaining flour mixture and fold this blueberry-flour mixture gently into the batter.

Pour cake batter into prepared pan and smooth so that it is relatively flat. Prepare the streusel by mixing the flour, cornmeal, sugar, cinnamon and salt, then mash in the butter in with a pastry blender, fork or your fingertips until the mixture resembles coarse crumbs.

Sprinkle the cake with the prepared streusel. Bake in heated oven for 40(ish) minutes (mine has taken 50 minutes, but the original recipe suggested 35), or until a toothpick inserted into the middle of the cake comes out batter-free. You can let the cake cool completely in the pan on a rack, or just cool it in the pan for 20 minutes before flipping it out onto a cooling rack, removing the parchment paper lining, and flipping it back onto a plate. Enjoy!


Salted Chocolate Granola

Chocolate Granola 1

When I get a new cookbook, I usually have a recipe I make the very next day because I just can’t wait to find out what it is. Well, my husband surprised me with a new cookbook in the mail while he was out of town recently (he knows my language of love), and this is the recipe I hopped to the very next minute I could. It comes from Valerie Gordon’s Sweet, with just one revision. She finely chops 8 oz. of bittersweet chocolate and sprinkles it on top of the granola when it’s hot out of the oven, stirs the granola after the chocolate melts, and then lets it cool before serving. She also serves this as a dessert (on top of ice cream or pudding). Well, I wanted this to be breakfast, so I omitted the extra chocolate, and it has been breakfast (and even lunch) nearly every day since I made it. I think it tastes like a very much improved version of Cocoa Puffs (that’s my high-brow opinion). And it’s very easy to not want anything to do with boxed cereals when you have this tucked in your cupboard. Yields about 12 cups.

Chocolate Granola Bowl
Salted Chocolate Granola

  • 4 cups wholemeal rolled oats
  • 1 1/2 cups sliced raw almonds
  • 1 cup raw hazelnuts, halved
  • ¼ cup cacao nibs
  • 1/3 cup  cocoa powder
  • 3/4 cup light brown sugar
  • ¼ cup honey
  • 1/3 cup vegetable oil
  • 2 t. vanilla bean paste
  • 1 1/2 tsp. fleur de sel or fine sea salt (I found some smoked chocolate salt that I used. Wow!)
  1. Preheat the oven to 250 F / 120 C. Line a baking sheet with parchment paper or a silicon liner and set aside. [I did 350 degrees and only baked it for 40ish minutes.]
  2. In a large bowl, mix together the rolled oats, almonds, hazelnuts, cacao nibs, and fleur de sel or fine sea salt.
  3. In a separate bowl, whisk together the cocoa powder, brown sugar, honey, oil and vanilla.
  4. Pour the wet ingredients over the dry ingredients and stir well with a rubber spatula until combined and evenly moistened.
  5. Spread the granola in an even layer on the prepared baking sheet. Bake for about 1 hour, stirring every 15 minutes, until crisp and the nuts are turning golden.
  6. Remove the granola from the oven and move the baking sheets to a cool area and allow the granola to cool. It can be stored in an airtight container for up to three weeks.

Chocolate Granola Spoon

Swedish Cinnamon-Cardamom Bread

Swedish Cardamom Bread

This recipe is the type of recipe that when I make, I think, I should make this everyday. Life would be a lot happier if I had this to look forward to in the morning or afternoon. Or evening. But, as it happens, I don’t make it everyday, and when I do make it, I’m lucky to get one slice, before all the kids, and darling friends of kids, quickly grab as much as they can.

This recipe is similar to a cinnamon roll, but you don’t cut the individual rolls, making the prep time a little bit faster, and the presentation much different. I love how the shaping of it encourages everyone to tear a handful and just eat! This recipe comes from the Jan. 2015 Saveur

Swedish Cinnamon-Cardamom Bread
For the dough
7 T. unsalted butter
1 12 c. whole milk, heated to 115°
2 t. active dry yeast
4 12 c. flour, plus more for dusting
14 c. sugar
1 12 t. cardamom seeds, lightly crushed (or ground cardamom)
14 t. kosher salt

For the filling
12c. granulated sugar
7 T. unsalted butter, softened
1 T. ground cinnamon
1 12t. cardamom seeds, finely crushed (or ground cardamom)
1 egg, beaten
Pearl sugar, for topping

Make the dough:
Melt butter in a 1-qt. saucepan over medium. Remove from heat and stir in milk and yeast; let sit until foamy, about 10 minutes. Whisk flour, sugar, cardamom, and salt in a bowl. Stir in yeast mixture until dough forms. Transfer dough to a lightly floured surface; knead until smooth and elastic, about 3 minutes. Return dough to bowl and cover with a clean dish towel; let sit in a warm place until dough is doubled in size, about 1 hour.

Make the filling:
Mix granulated sugar, butter, cinnamon, and cardamom in a bowl until smooth.

Assemble the bread:
On a lightly floured surface, roll dough into an 11″ x 17″ rectangle, about 14″ thick. Spread filling over dough, leaving a 12″ border along edges. [I’ve found it works better to divide the dough into two and make two separate loaves. They fit on an baking sheet better. They spread quite a bit in baking!] Working from one long end, roll dough into a tight cylinder; transfer seam side down to a parchment paper-lined baking sheet. Cover with dish towel; let sit in a warm place until dough has doubled in size once more, about 45 minutes.

Bake the bread:
Heat oven to 375°. Using kitchen shears and starting 1″ from ends of dough, make crosswise cuts, spaced 1″ apart, three-quarters of the way through dough. Fan dough slices away from the center, alternating left to right. Brush dough with egg and sprinkle with pearl sugar; bake until golden brown, about 22 minutes. Let bread cool completely before serving.


Blueberry Cream Hand Pies


So, right now my kitchen is a mess and I have papers to grade, but I’m so excited to write about these little pies that I can’t wait. Having Valentines be on Sunday this year will make it easier to have these sweet little pies for breakfast, which I usually try to do, and have been known to even roll out of bed early to make it happen (though this is really not typical of me). I started making these handpies specifically for Valentines Day a couple of years for the simple reason that I bought a pie press in the shape of a heart and I wanted to use it. But now, these are just my favorite way to share a little love, and create one of the best breakfasts (or desserts, depending on how busy the day becomes!) of the year. I’ve changed the filling, but otherwise am using the recipe from the
Flour bakery cookbook called Homemade Pop-Tarts. 

Blueberry Cream Hand Pies

Pâte Brisée (recipe below)
1 egg, lightly beaten
1 cup (340 grams) blueberry jam*
1/2 cup mascarpone cheese or cream cheese, whipped, and at room temperature

Simple Vanilla Glaze
1 cup (140 grams) confectioners’ sugar
1/4 teaspoon vanilla extract
2 to 3 tablespoons water

Position a rack in the center of the oven, and heat the oven to 350 degrees F.

Remove the dough from the refrigerator and divide it in half. Press each half into a rectangle. On a lightly floured surface, roll out each half into a 14-by-11-inch rectangle. Using a paring knife, lightly score 1 rectangle into eight 3 1/2-by-5 1/2-inch rectangles (about the size of an index card). [If using a decorative cutter, plan accordingly.]

Brush the top surface of the entire scored rectangle with the egg [this is an IMPORTANT step]. Spoon 1 tablespoon of cheese and 1 tablespoon of the jam in a mound in the center of each scored rectangle. Lay the second large dough rectangle directly on top of the first. Using fingertips, carefully press down all around each jam mound, so the pastry sheets adhere to each other.

Using a knife, a pizza roller (easier), or a fluted roller (easier and prettier), and following the scored lines, cut the layered dough into 8 rectangles. Place the rectangles, well spaced, on a baking sheet. [You, of course, can also use the heart pie press if you also couldn’t resist buying one at the store.]

Bake for 40 to 45 minutes, or until the tops of the pastries are evenly golden brown. Let cool on the baking sheet on a wire rack for about 30 minutes.

IMG_8474

To make the glaze: While the pastries are cooling, in a small bowl, whisk together the confectioners’ sugar, vanilla, and enough of the water to make a smooth, pourable glaze. You should have about 1/2 cup. (The glaze can be made ahead and stored in an airtight container at room temperature for up to 1 week.)

When the pastries have cooled for 30 minutes, brush the tops evenly with the glaze, or write sweet messages with the glaze in a piping bag. Let stand for 10 to 15 minutes to allow the glaze to set before serving.

The pastries can be stored in an airtight container at room temperature for up to 2 days.

IMG_8491

Pate Brisee Recipe

1 3/4 cups (245 grams) unbleached all-purpose flour
1 tablespoon sugar
1 teaspoon kosher salt
1 cup (2 sticks / 228 grams) cold unsalted butter, cut into 12 pieces
2 egg yolks
3 tablespoons cold milk

Using a stand mixer fitted with the paddle attachment (or a handheld mixer), mix together the flour, sugar, and salt for 10 to 15 seconds, or until combined. Scatter the butter over the top. Mix on low speed for 1 to 1 1/2 minutes, or just until the flour is no longer bright white and holds together when you clump it and lumps of butter the size of pecans are visible throughout.

In a small bowl, whisk together the egg yolks and milk until blended. Add to the flour mixture all at once. Mix on low speed for about 30 seconds, or until the dough just barely comes together. It will look really shaggy and more like a mess than a dough.

Dump the dough out onto an unfloured work surface, then gather it together into a tight mound. Using your palm and starting on one side of the mound, smear the dough bit by bit, starting at the top of the mound and then sliding your palm down the side and along the work surface (at Flour we call this “going down the mountain”), until most of the butter chunks are smeared into the dough and the dough comes together. Do this once or twice on each part of the dough, moving through the mound until the whole mess has been smeared into a cohesive dough with streaks of butter.

Gather up the dough, wrap tightly in plastic wrap, and press down to flatten into a disk about 1 inch thick. Refrigerate for at least 4 hours before using. The dough will keep in the refrigerator for up to 4 days or in the freezer for up to 1 month.

*I usually make my own blueberry jam by heating up about a cup of frozen blueberries, without adding water, and a 1/2 c. of sugar, over medium heat, in a covered pot. Once the mixture is boiling, I mix a tablespoon of cornstarch with a tablespoon of water and stir it in slowly, and return the mixture to a boil. After it thickens, I remove the pot and add 1 T. of vanilla extract (I love it with the blueberries!) but you can be more circumspect, or even not include it altogether. One teaspoon of lemon juice is also a nice addition. As is vanilla bean paste.

IMG_8506

Happy Valentines Day!!

Orange & Chocolate Panettone

Panettone
I’ve been wanting to make panettone to have on Christmas morning for years, so I have had this recipe tucked away in a binder, waiting for the Christmas when I would be able to accomplish it. I’ve wanted to make this panettone in particular because, although I like the idea of an assortment of fruits and nuts in a Christmas bread, it isn’t that easy to find them where I live, and my kids don’t go for it. So, I thought that a more familiar orange and chocolate flavor would appeal to the whole family.

This year became the year for the panettone, which meant I actually had panettone paper liners (hooray!) and made the time to make this bread. But the thought that this would appeal to everyone? Well, I was wrong. The kids really wanted nothing to do with this bread. On the happy side, the adults just loved it. It was fantastic.

I know that the difference between store-bought anything and its homemade counterpart is usually quite distinctive, but this one really shows off. The texture is so much lighter and fresher and brighter than any panettone I’ve had before. The flavors are rich and full and the bread showcases them perfectly. Hopefully, when I bring this out in holidays to come, the kids will be more on board! This recipe comes from a 2009 copy of Martha Stewart Living. Also, note that this bread needs to be started at least 24 hours in advance, to allow for an overnight rise in the fridge.

Orange & Chocolate Panettone

  • 1 T. plus 1 1/2 t. active dry yeast (two 1/4-ounce envelopes)
  • 1/3 c. whole milk, warmed
  • 14 oz. unbleached bread flour (about 3 cups), plus more for surface
  • 1/4 c. granulated sugar
  • 4 large eggs, lightly beaten, plus 1 large egg
  • 1 1/2 t. coarse salt
  • 10 oz. (2 1/2 sticks) unsalted butter, room temperature
  • 5 1/2 oz. bittersweet chocolate, coarsely chopped (1 1/4 cups)
  • 1 c. diced candied (glazed) orange peel (make your own!)
  • 1/2 t. pure almond extract
  • 1/2 t. pure orange extract
  • Vegetable oil, for bowl
  • 2 t. best-quality unsweetened cocoa powder
  • Pearl sugar, for sprinkling
  • 1/4 c. plus 2 T. sliced almonds, for sprinkling
  1. Sprinkle yeast over milk in the bowl of a mixer fitted with the dough-hook attachment. Let stand until foamy, about 5 minutes. Sprinkle 2 ounces flour (about 1/2 cup) and 1 tablespoon granulated sugar over top. Cover with plastic, and let stand for 1 hour.

  2. Add remaining 12 ounces flour and 3 tablespoons granulated sugar, the beaten eggs, and the salt. Mix together on medium speed until dough forms a smooth, stiff ball, about 5 minutes. Add butter, 1 tablespoon at a time, mixing well after each addition.

  3. Switch to paddle attachment, and mix dough on medium-high speed for 5 minutes. Reduce speed to low, and add chocolate, orange peel, and extracts. Mix until combined.

  4. Turn out dough onto a clean surface, and form into a ball. Transfer to a lightly oiled bowl. Cover with plastic, and refrigerate overnight.

  5. Bring dough to room temperature [this can take a little while!!], and divide in half. Form each half into a ball; place each in a 5 1/4-by-3 3/4-inch paper panettone mold. Transfer to a baking sheet. Let stand in a warm place until doubled in volume, about 2 hours.

  6. Preheat oven to 350 degrees. Lightly beat remaining egg and the cocoa powder together. Brush glaze mixture onto panettone dough, and sprinkle with pearl sugar and almonds. Bake until golden brown, about 50 minutes.

  7. Remove molds from oven, and run a wooden skewer horizontally through the bottom of each panettone loaf. Hang loaves upside down by propping ends of each skewer on 2 large, heavy cans [this step prevents the loaves from collapsing inwards. I was rushed on time and innovative thinking, so I just flipped them upside down. It worked fine because the loaves didn’t raise above the wrapper edges]. Let cool completely.