Chocolate & Cream Yule Log

img_2810
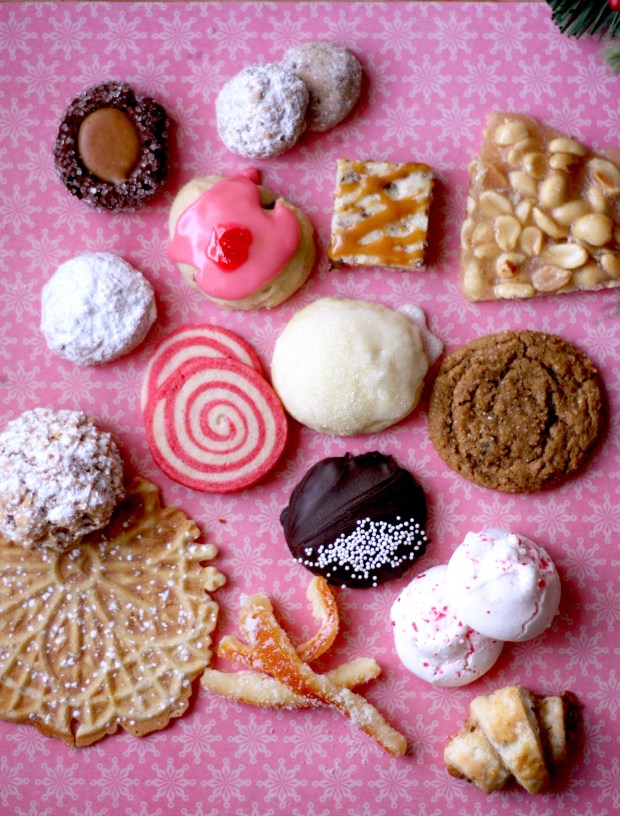
The Christmas and New Year Season has died down, the kids and my husband and I are all back in school, and I’m finally getting a moment to record the fun baking we did at Christmas this year. My favorite part: the Buche de Noel. This Christmas cake is a tradition my dad brought home with him from France, and he’s usually the one who bakes it each year, but I was excited that he let me make it this year.

I found this recipe in one of the funnest baking books I own, called Baked. I will include their directions, though I changed them a bit. I’m not as big of a fan of malted milk balls as they are, so I substituted chestnut paste  (which is a more traditional French flavor) and I also made it into the more traditional log instead of a stump. Otherwise, I was super happy with how it turned out. Hope it goes this well again next year!

Chocolate & Cream Yule Log

  • 1 cup all-purpose flour, plus more for dusting
  • 1/4 cup unsweetened cocoa powder, sifted
  • 1/4 teaspoon salt
  • 3/4 pound bittersweet chocolate, melted and cooled
  • 2 tablespoons instant espresso powder dissolved in 1/4 cup of hot water (I would cut this down to 1 T. next time. I thought it was the dominant flavor as is)
  • 1 dozen large eggs, at room temperature, separated
  • 1 1/3 cups sugar
  • 1 tablespoon plus 1 teaspoon pure vanilla extract
  • 1/4 teaspoon cream of tartar
  • 6 tablespoons unsalted butter, melted
  • Malted Buttercream and Dark Chocolate Buttercream
  • Meringue mushrooms, candied cranberries and candied rosemary sprigs, for garnish (optional; see Note)

Preheat the oven to 350. Butter two 12-by-17-inch rimmed baking sheets and line them with parchment paper, leaving a 1-inch overhang on all of the short sides. Butter the paper and dust with flour.

In a small bowl, whisk the 1 cup of flour with the cocoa and salt. In another small bowl, combine the chocolate and espresso. In the bowl of a standing electric mixer, combine the egg yolks with 2/3 cup of the sugar. Set the bowl over a pan of simmering water and whisk until the sugar is dissolved. Transfer the bowl to the mixer fitted with the whisk and beat at high speed until the yolks are pale and thick, about 5 minutes. Beat in the melted chocolate mixture along with the vanilla. Transfer to a large bowl.

Thoroughly wash and dry the mixer bowl and the whisk. Beat the egg whites with the cream of tartar on moderately high speed until soft peaks form. Gradually add the remaining 2/3 cup of sugar and continue beating at high speed until the whites are glossy, about 2 minutes longer. Whisk one-fourth of the egg whites into the cake batter, then fold in the remaining whites until no streaks remain.

In a small bowl, whisk the melted butter with 1/2 cup of the batter; fold this mixture into the batter. Working in 2 batches, sift the cocoa powder mixture over the batter and gently fold it in. Divide the batter between the prepared pans, spreading it out to fill the pans. Bake for about 18 minutes, until the cake feels springy and dry; shift the pans from top to bottom and front to back halfway through baking. Transfer the pans to racks to cool completely. Run the tip of a knife around the edges, cover with parchment paper and a baking sheet and invert; peel off the parchment on top.

Spread the Malted Buttercream over the cakes. Using a ruler, cut each cake precisely in half lengthwise, cutting through the paper; you should have four 6-by-17-inch strips of cake. Roll one strip into a tight coil, leaving the paper behind. Roll the 3 remaining cake strips around the coil in the same way to form a very wide, short jelly roll. Set the cake on a large plate, spiraled end up. Frost the outside of the cake with the Dark Chocolate Buttercream. Refrigerate until set, at least 8 hours. Decorate the cake with meringue mushrooms, cranberries and rosemary sprigs and serve, cutting the cake into wedges or horizontal slices.

img_2803

Chocolate & Malted Buttercream

  • 5 large egg whites, at room temperature
  • 1 1/2 cups sugar
  • 1 teaspoon pure vanilla extract
  • 4 sticks (1 pound) unsalted butter, at room temperature
  • 4 ounces bittersweet chocolate, melted and cooled
  • 1/4 cup malt powder, dissolved in 2 tablespoons of hot water
  • 12 malted milk balls, crushed (I used chestnut paste instead. Or, I think I would just use vanilla bean paste)

In the bowl of a standing electric mixer, combine the egg whites and sugar. Set the bowl over a pot of simmering water and whisk until the sugar is dissolved and the egg whites are just warm to the touch. Return the bowl to the mixer fitted with the whisk. Add the vanilla and beat the egg whites at high speed until firm and glossy, about 5 minutes. With the machine on, whisk in the butter a few tablespoons at a time. If the mixture begins to look curdled, continue to beat until smooth before adding more butter. Transfer 1 1/2 cups of the buttercream to a bowl and whisk in the melted chocolate. Beat the dissolved malt powder into the remaining buttercream, then beat in the milk balls.


Advertisement

Christmas Cookies!

I know it’s been awhile, but with the last ounce of grading for the semester under my belt, I’m back to kitchen, and loving this year’s Christmas collection. I’ve already posted many of these recipes, but will post more as time allows. Such a wonderful time of year!

christmas-2015

Pictured above are White Christmas Dream Drops, Brown Sugar Rugelach, My Ginger Cookies, Peanut Brittle, Pizzelles, Pink and White Pinwheels, Italian Cherry Cookies, Chocolate Thumbprints with Salty Caramel, Candied Orange Peel, Mint Chocolate Cookies, Lemon Glazed Cookies, Russian Teacakes, and Pfefferneuse. I have most of these recipes on my site, but will get the rest soon. Hope something appeals!

Pear, Fig & Onion Quiche

IMG_2328

It’s been such a busy month, I haven’t had a second to breathe! Finally, though, middle school, elementary school, and now preschool have started, and I’m back to teaching at the university as well. That doesn’t sound like things are going to get less hectic! However, at least now there’s more of an enforced bedtime around here, and a chance to sit and look over what I’ve been wanting to post.

This recipe was an easy favorite of the last few weeks. I made it for a shower of a dear friend; it sounded like the perfect shower food, and perhaps a little too indulgent for just a weeknight meal. The recipe comes from Lebovitz’s My Paris Kitchen cookbook, but he titles it Pear and Blue Cheese Quiche. The blue cheese flavor was soooo mild, though, that I hardly think we need to mention it in the title, since it will turn away all those who think they hate the stuff, when they probably won’t be aware that it’s in there if they try it. So, I’ve retitled, and also added figs, simply because I could get them, and I don’t know of anything prettier on the top of a festive summer food.

Pear, fig & onion Quiche

Crust
1 c. (140g) all-purpose flour
1/3 c. (55g) cornmeal
1/2 t. sea salt or kosher salt
8 T. (4 ounces/115g) unsalted butter, cubed and chilled
1 large egg

Filling
1 T. olive oil
6 shallots, peeled and thinly sliced (I used two small red onions, hence the name!)
Sea salt and freshly ground black pepper
1 large, firm, ripe pear, peeled and diced into 1/2-inch (1.5cm) cubes
1 c. (130g) diced cooked (boiled) ham (or bacon, or omit for vegetarian)
1 1/2 c. (375ml) heavy cream or half-and-half
8 oz. (225g) cream cheese
Freshly grated nutmeg
4 large eggs
2 egg yolks
1 1/2 c. (150g) crumbled blue cheese or Roquefort (or goat cheese)
2 T. minced fresh flat-leaf parsley
1 T. fresh thyme (my addition)
2 fresh figs, sliced, for decoration (also my addition)

  1. To make the crust, in the bowl of a stand mixer fitted with the paddle attachment (or in a bowl, by hand with a pastry blender), combine the flour, cornmeal, and salt. Add the butter and beat on low speed until the butter is broken up and the mixture is sandy. Add the egg and mix until the dough begins to clump and come together. Use your hands to gather the dough and shape it into a disk. Wrap it in plastic and chill for at least 30 minutes. (The dough can be made up to 2 days in advance.)
  2. Roll out the chilled dough on a lightly floured surface until it’s 14 inches (35cm) across. Wrap aluminum foil around the outside of a 9- to 10-inch (23 to 25cm) springform pan to catch any leaks, and then transfer the dough to the pan. Press the dough against the side, allowing it to come a bit more than halfway up the sides of the pan. If there are any cracks, patch them with a bit of dough from the edges—you don’t want the filling to leak out during baking. Chill the dough in the pan while you make the filling.
  3. Preheat the oven to 375°F (190°C).
  4. To make the filling, heat the oil in a skillet over medium heat and cook the shallots with some salt and pepper until soft and translucent, 3 to 5 minutes. Remove from the heat and stir in the diced pear and ham.
  5. In a large bowl, blend together the cream, cream cheese, a few gratings of nutmeg, the eggs, and the yolks until smooth. Stir in the blue cheese, the pear and ham mixture, and the parsley and thyme.
  6. Set the springform pan on a rimmed baking sheet and pour in the filling, using a spoon to make sure the ingredients in the filling are evenly distributed. Please figs in a pattern on top, if using. Bake the tart for 45 to 50 minutes, until the top is lightly browned, the filling still jiggles, and a toothpick inserted into the center comes out clean. Let cool until firm enough to slice, then serve warm or at room temperature.

    Pear Fig Quiche

Honeyed Apricot Flatbread with Rosemary

Apricot Flatbread 2

It’s truly summer. Lots of time away, running our five kids to swim, play, hike, visit cousins and squeezing in a vacation or two. So, I’m missing my normal kitchen time just a little. As part of my hopes to reconnect (with my kitchen), I started a sponge for ciabatta last night. Unfortunately, I was thinking about the timing today very well, and since we had a crazy day of violin lessons, meeting with middle school counselors, celebrating the birth of my cousin’s baby, and swimming, there was no chance for the ciabatta to become ciabatta. So, instead, I turned it into flatbreads to serve along with a fresh tomato soup, and then starting digging through the fridge for toppings. I did a couple with cheese and pepperoni for the kids, two with fresh figs and goat cheese, and then I tried something new, needing to use all the apricots on my counter (obviously, I just used a couple, but the rest are now happily stored in my freezer). I think I will do this one again, perhaps with plums or peaches next time. This idea is a riff from a memorable appetizer in Lisbon many years ago where I had the marriage of honey and rosemary and cheese for the first time. Still beloved!  So, here’s a little idea, if you need one, for a fun, and a little bit sweet, summer meal.

Honeyed Apricot Flatbread with Rosemary

pizza dough (any kind, but here’s my favorite)
1/2 c. ricotta cheese
4-5 fresh apricots (or peaches or plums), sliced in half and pitted
2 T. honey
a handful of rosemary

Preheat oven to 475 degrees, with a pizza stone, if you have one placed in the lower half of the oven.

After the pizza dough has had its final rise, shape it by stretching into a circle or oblong and place on parchment paper. Top with ricotta, dolloping it and then lightly spreading it. Then, place apricots on top, with the skins on the bottom. Drizzle honey over the entire flatbread, then sprinkle rosemary and a little bit of salt.

Using a pizza peel, place the flatbread on the pizza stone. Bake for 6-8 minutes, or until browned on top and bottom. Remove to a rack to let it cool for at least ten minutes before serving.

Apricot Flatbread 1

Nibby Chocolate Chip Cookies

Nibby Chocolate Chips

Have I mentioned that I like to try new recipes? Even if I have four chocolate chip cookies that are my favorite? (If you’re interested in the lineup, this includes an old  ATKs, and Josey Baker’s, which is so amazing, and the 100% whole wheat from Good to the Grain, and King Arthur’s one with a little bit of oatmeal, making it awesomely chewy.) Well, since I got a new little baking book, Bake Good Things, I had to try it’s chocolate chip cookie, because it’s new. And, I like new, because it either reaffirms that I do indeed already have the perfect chocolate chip cookie recipe, or it adds something that the other recipes don’t quite have. This recipe, for example, is extremely loaded with chocolate, and it is much crisper than the other recipes I love. But I switched things a bit by   replacing some of the chips with cocoa nibs, to see if it changed the chocolate flavor in an interesting way, as well as give it a little crunch. Yes on both.  So, if you also want to try something new with your chocolate chip cookie, here’s a good one! 

Nibby Chocolate Chip Cookies

1 1/4 cups (6 1/2 oz./200 g) unbleached all-purpose flour
1 tsp. baking soda
1/2 tsp. salt
1/2 cup (1 stick/4 oz./125 g) unsalted butter, at room temperature
1/2 cup (3 1/2 oz./105 g) firmly packed light brown sugar
6 Tbs. (3 oz./90 g) granulated sugar
1 large egg
1 tsp. vanilla extract
1 1/2 cups (15 oz./470 g) semisweet chocolate chips
1 cup cocoa nibs (can substitute for chocolate chips, or buy them quite easily on Amazon!)

Preheat the oven to 350°F (180°C). Line 2 baking sheets with parchment paper.

In a bowl, sift together the flour, baking soda and salt. In a large bowl, using an electric mixer on medium speed, beat the butter, brown sugar and granulated sugar until smooth, about 2 minutes. Add the egg and vanilla and mix on low speed until blended. Slowly add the flour mixture and mix just until incorporated. Switch to a wooden spoon and stir in the chocolate chips and nibs.

Using a small ice cream scoop or heaping tablespoon, drop the dough onto the prepared baking sheets, spacing the dough mounds 2 inches (5 cm) apart. (For crisper cookies, drop by teaspoonful.)

Bake the cookies, 1 sheet at a time, until the bottoms and edges are lightly browned and the tops feel firm when lightly touched, 10-13 minutes. Let the cookies cool on the baking sheets for 5 minutes, then transfer the cookies to wire racks to cool completely. Makes 30 cookies.

NIbby Chocolate Chips 2

Summer Lime Cake


Zucchini and Lime Cake
This was such an unusual sounding cake, I had to try it. I expected a flavor totally different than what came out. Essentially, this cake is just a really moist cake with a terrific lime frosting on top. In fact, my father-in-law asked if it was a “key-lime cake,” and then had another slice, and my twelve-year-old (who was complaining that if I made a zucchini cake, no kids would it eat) ate four slices. So, I think if you’re not really into zucchini, you’re still likely to enjoy this cake! I’ve made it twice in the last week, which says a little bit about how well zucchini are growing around here. This recipe comes from Three Sisters Bake, an enchanting cookbook by these Scottish sisters that is a delight to read and look at. I’ve adjusted the measurements for US, but included the original ones as well. I’ve also adapted the baking powder for better results at high temperature (if you’re at sea level, you may want to take it down a teaspoon).

Summer Lime Cake
For the cake:

  • 1/2 c. (135ml) sunflower oil
  • 4/5 c. (200g) caster sugar
  • 3 large eggs, at room temperature
  • 2 1/2 c. (300g) all-purpose flour
  • 4 tsp. baking powder
  • 1/2 tsp. salt
  • 12 oz. (335g) zucchini, finely grated
  • grated zest of 2 limes

For the icing:

  • 3/4 c. (200g) full-fat cream cheese, at room temperature
  • 3/4 c. (100g) icing sugar
  • grated zest of 1 lime
  • juice from 2-3 limes

Preheat the oven to 350 degrees (160C, gas 2). Line the base and sides of an 8-in. springform cake pan with parchment paper.

Beat the oil, sugar and eggs together in a large bowl with an electric hand mixer for 2-3 minutes, until light and fluffy. Sift in the flour, baking powder, and salt and fold into the mixture. Fold in the grated zucchini and lime zest.

Pour into the prepared tin and bake for 40-45 minutes, until golden brown and a skewer inserted into the middle of the cake comes out clean. Allow the cake to cool a little in the tin, then turn out onto a wire rack.

To make the icing, beat the cream cheese and icing sugar together until smooth. Add the lime zest and juice and beat another 2-3 minutes on high to get really light and fluffy.

Once cool, top the cake with the icing by running a spatula or palate knife back and forth over the cake creating deep grooves to give a nice textural look.

Zucchini and Lime Cake 2

If you look closely, you can see my cream cheese wasn’t at room temperature for this one. Whoops!


Bright Triple Berry Pie

Triple Berry Pie

My daughter Lucy sat and read the whole pie section of America’s Test Kitchen Family Cookbook on Saturday in order to pick which pie we should make for fireworks that night (in addition to the already decided key lime pie), and we both settled on this one. I thought it sounded fine, good even, but when we sat to eat it, I was way more excited by the flavor than I thought I would be. This pie is better than all the parts, and a really nice alternative to all the cream pies, which I have a soft spot for, but can be a little too rich after a big grill. So, this is an easy, bright alternative that is a delicious pie, and actually flew off the table faster than the key lime. How did that happen?! Happy Fourth!

Bright Triple Berry Pie

Graham Cracker Crust
9 graham crackers, broken into rough pieces
2 T sugar
5 T unsalted butter, melted and warm


Berry Filling

2 c raspberries (about 9 ounces) (I used strawberries, which were great!)
2 c blackberries (about 11 ounces)
2 c blueberries (about 10 ounces)
1⁄2 c granulated sugar (3 ½ ounces)
3 T cornstarch
1⁄8 t salt
1 T lemon juice (from 1 lemon)
2 T red currant jelly


Whipped Cream

1 c cold heavy cream
1 T sugar
1 t vanilla extract

For the crust: Adjust an oven rack to the middle position and heat the oven to 325 degrees.

In a food processor, process the graham crackers until evenly fine, about 30 seconds (you should have 1 cup crumbs). Add the sugar and pulse to combine. Continue to pulse while adding the warm melted butter in a steady stream; pulse until the mixture resembles wet sand and then transfer the crumbs to a 9-inch glass pie plate. Using a ½-cup dry measuring cup, press the crumb mixture into the plate.

Bake the crust until fragrant and beginning to brown, 15 to 18 minutes; transfer to a wire rack and cool completely while making the filling.

For the filling: Combine the berries in a large colander and gently rinse (taking care not to bruise them); spread the berries on a rimmed baking sheet lined with paper towels and gently pat dry with additional paper towels.

In a food processor, puree 2 ½ cups mixed berries until smooth and fully pureed, about 1 minute. Strain the puree through a mesh strainer into a small nonreactive saucepan, scraping and pressing on the seeds to extract as much puree as possible (you should have 1 ¼ to 1 ½ cups).

Whisk the sugar, cornstarch, and salt in a small bowl to combine, then whisk the mixture into the puree. Bring the puree to a boil over medium heat, stirring constantly with a wooden spoon; when the mixture reaches a boil and is thickened to the consistency of pudding, remove from the heat, stir in the lemon juice, and set aside to cool slightly.

While the puree is cooling, place the remaining berries in a medium bowl.

Heat the jelly in a second small saucepan over low heat until fully melted.Drizzle the melted jelly over the berries and toss gently with a rubber spatula to coat. Pour the slightly cooled puree into the cooled pie shell and smooth the top with a spatula. Distribute the glazed berries evenly over the puree and gently press them into the puree.

Loosely cover the pie with plastic wrap; refrigerate until chilled and the puree has set, about 3 hours or up to 1 day.

For the whipped cream: Just before serving, beat the cream, sugar, and vanilla with an electric mixer on low speed until small bubbles form, about 30 seconds. Increase the speed to medium; continue beating until the beaters leave a trail, about 30 seconds longer.

Increase the speed to high; continue beating until the cream is smooth, thick, nearly doubled in volume, and forms soft peaks, about 30 to 60 seconds.

Cut the pie into wedges and serve with whipped cream.

Triple Berry Pie 2

Buttery Blueberry Crumb Cake

Blueberry Crumb Cake

Smitten Kitchen is a wonderful blog, and although I’ve spent a little time exploring it, I’ve spent much more time looking at Deb Perelman’s cookbook of the same name, which has such terrific ideas and spins on tastes and flavors. Very inspirational. And of course, I’m right on board with her when it comes to baking. This is one of my favorite bakes from this cookbook. I made it last weekend for my sister’s baby blessing, and am happy to share the recipe here for those who were wanting it! Such a simple cake, but just delicious, and perfect for brunches or breakfast or dessert. Interestingly, this is not the same recipe that is on her blog! 

Buttery Blueberry Crumb Cake

Streusel
6 tablespoons (40 grams) all-purpose flour
2 tablespoons cornmeal
1/2 cup (100 grams) granulated sugar
1/4 teaspoon ground cinnamon
2 tablespoons unsalted butter, cold is fine
Pinch of salt

Cake:
1 cup all-purpose flour
1/2 cup cornmeal
2 teaspoons baking powder
1/2 teaspoon table salt
8 tablespoons unsalted butter, softened
1 cup (150 grams) granulated sugar
1/4 teaspoon lemon zest
2 large eggs
1/4 teaspoon vanilla extract
2 cups fresh blueberries, clean and dry
1/3 cup sour cream

Heat oven to 350°F. Butter a 8-inch square baking pan (with at least 2″ sides) and dust it lightly with flour, or line it with a round of parchment paper or spray with nonstick spray.

In a medium bowl, whisk flour, cornmeal, baking powder, and salt until combined, and set aside. In a mixing bowl, beat butter and sugar together until light and fluffy (about two minutes). Add eggs one at a time, then add the vanilla and the zest and beat until combined. Beat in 1/3 of the dry ingredient mixture until just combined, followed by all of the sour cream; repeat with another 1/3 of the flour, mix, and then combine the blueberries with the remaining flour mixture and fold this blueberry-flour mixture gently into the batter.

Pour cake batter into prepared pan and smooth so that it is relatively flat. Prepare the streusel by mixing the flour, cornmeal, sugar, cinnamon and salt, then mash in the butter in with a pastry blender, fork or your fingertips until the mixture resembles coarse crumbs.

Sprinkle the cake with the prepared streusel. Bake in heated oven for 40(ish) minutes (mine has taken 50 minutes, but the original recipe suggested 35), or until a toothpick inserted into the middle of the cake comes out batter-free. You can let the cake cool completely in the pan on a rack, or just cool it in the pan for 20 minutes before flipping it out onto a cooling rack, removing the parchment paper lining, and flipping it back onto a plate. Enjoy!


Chocolate Sorbet & Pizzelles

Chocolate Sorbet 1

A couple of summers ago, my husband had business that took him to Lisbon, Portugal for about a month. I joined him for the last week of his travel, which put me there with the heat of summer. There weren’t many places with air conditioning, including the apartment we were staying in, and after walking up and down the hills of the city all day, we frequently stopped to get ice cream or cold drinks. Luckily, someone had recommended that we stop into a chocolate shop called Claudio Corallo (though I think the name has since changed). The first day we went in, we just ordered some of their handcrafted chocolate when the woman working there asked if we had had their chocolate sorbet. It wasn’t listed on the menu, so we of course didn’t know anything about it, but she brought us out two scoops.

It was made from their own cocoa (not available in the U.S. but sometimes a friend will bring us a bar–such kindness!) and had the most incredibly smooth texture, even though she told us it was just chocolate–no cream or dairy. Well, the other day I came across this recipe, and it seemed possible that it could be similar to the chocolate sorbet at Corallo’s. I’m sad to say it probably wouldn’t win a competition with Corallo, but I’m happy to say that with a little Caillebaut chocolate and dutch cocoa, I came pretty close. This recipe comes from Joanne Chang’s Flour cookbook.  I served it in a pizzelle, which I added orange zest to, as a compliment to the chocolate, and then I shaped it into a cup in a large muffin tin, rather than a cone. Aah, summer. Wish I was heading back to Lisbon soon!

Chocolate Sorbet 2


Bittersweet Chocolate Sorbet

1 cup (200 grams) sugar
3 1/2 cups water
3/4 cup (90 grams) Dutch-processed cocoa powder
4 ounces (114 grams) bittersweet chocolate (60-70 % cacao), finely chopped
1 teaspoon vanilla extract
1/2 teaspoon kosher salt

Put the sugar in the bottom of a medium saucepan. Add 1/2 cup (120 grams) of the water and gently swirl the pan to moisten the sugar. Place the pan over high heat and leave it undisturbed until the contents come to a rolling boil. Then continue to boil rapidly without moving the pan until the sugar syrup starts to caramelize. This will take 3-4 minutes: the sugar syrup will boil furiously, then as it thickens it will boil more languidly, and then you will see some of the syrup start to color and darken around the edge of the pan.

When you see color in the pan, gently swirl it in a circular motion so the sugar caramelizes evenly, and then keep swirling gently until the caramel is a medium golden brown. Turn down the heat to low and slowly and carefully add the remaining 3 cups (720 grams) water. Be careful, because it will sputter and spatter when it hits the caramel. The caramel will harden at the bottom of the pan; turn up the heat to high, bring the mixture back to a boil, and whisk for a few minutes until the caramel fully dissolves. Then whisk in the cocoa powder until fully dissolved.

Place the chocolate in a medium heatproof bowl. Pour the hot caramelized liquid over the chocolate and let sit for 1 minute, then whisk gently until the chocolate is completely melted and the mixture is smooth. Strain the mixture through a fine-mesh sieve into a container, and whisk in the vanilla and salt. Cover and refrigerate for at least 2 hours, or until cold.

Churn in an ice cream maker according to the manufacturer’s directions. Sorbet can be stored in an airtight container in the freezer for up to 1 week.

Chocolate Sorbet 3

A New Spring Salad Dressing

Turkey Celery Wide

I did something this year I’ve been wanting to do for a quite a few years. Back in March, on a particularly warm day, we prepped our garden boxes and then filled them with all sorts of cool weather seeds: lettuce, arugula, beets, radishes, spinach, onions, fennel, garlic, and peas. Every day, I’ve been watching and waiting to see if I’ve finally become a good enough gardener to get these little seeds to grow. Well, they came up, and they are beautiful. We have buttercrunch lettuce and arugula that just keeps coming and coming, so we’ve been eating salad after salad. This is a new favorite dressing for these salads that I got from the terrific cookbook called The Food Lab. It’s simply delicious, and makes a it easy to throw anything and still have great flavor, but one of my favorites has been arugula, lettuce, celery, turkey, and sunflower seeds or cooked wheatberries. 

Balsamic-Soy Vinaigrette

1/2 c. vegetable oil
1/4 c. olive oil
a small shallot, minced or grated on a microplane
2 cloves garlic, minced or grated on a microplane
4 t. dijon mustard
3 T. balsamic vinegar
1 T. soy sauce
salt and pepper to taste (about 1/2 t. salt for me, and a few shakes of pepper)

Combine all ingredients together in a glass jar, shake well to emulsify, and then resupply yourself in three days, since you will want it every lunch and dinner! It will keep for up to three months in your fridge, if you find yourself not wanting it quite as often as I do.