Italian Cherry Cookies

Italian Cherry Cookies
This cookie calls out to be a perfect Valentines Day treat. I found it after going through my friend’s blog, Judy’s Culinaria, this Christmas. I was so motivated to try some of her incredible looking cookie recipes, and I was delighted with every single one! With her permission, I’m posting some of them (in case she accidentally deletes them or some other horrible disaster, and also just to share them with more people!). This cookie was an instant favorite, and honestly, the maraschino cookie recipe I’ve been looking for, and I’ve spent a long time looking! I know these cherries are quite divisive among tastes, but in my opinion, when maraschino cherries are in the mix, it’s always an automatic, “yes. please.” So, for the holidays, for Valentines. And maybe just for Fridays, here’s a fantastic cookie.

Italian Cherry Cookies
1/2 c. unsalted dairy-free margarine or butter
1/2 c. shortening
2 c. granulated sugar
4 large eggs, room temperature
1 T. almond emulsion or extract
1 t. vanilla extract
1/2 c. almond milk or regular milk
1/2 c. maraschino cherry juice
1 c. maraschino cherries, chopped
7 c. flour (can use 1/2 c. more if too sticky)
5 t. baking powder
1/2 t. kosher salt

Cherry Glaze
1 c. powdered sugar, sifted
3 T. maraschino cherry juice
1-1/2 t. almond emulsion or extract

In a mixing bowl combine margarine and shortening. Beat to mix together, then add sugar and beat until light and fluffy, about 3 minutes. Add eggs and extracts. Mix well. Add milk and cherry juice. Mix, then add cherries and beat until mixed, about 1 minute. Sift flour, baking powder, and salt and gradually add to the wet ingredients. Cover with plastic wrap and chill overnight. The next day line four baking sheets with parchment paper and preheat oven to 350 degrees. Sprinkle a bit of flour over the dough and onto hands. Roll dough into balls just a bit larger than a marble. Place on baking sheet and bake 8-9 minutes until cookies are light golden on bottom. Cool on rack. Whisk together glaze ingredients until smooth. Dip cookies into glaze. Let excess glaze drip off. Place on rack to dry. Store in an airtight container with wax paper between cookie layers. Allow cookies to age for several days before eating. Makes 175 cookies. (For me, it was more like 100.)

Judy suggests that these cookies are best when they have aged a few days, but we weren’t able to test that theory at our house. All gone. Very soon.

Spiced Lemon Almond Cake

Spiced Lemon Almond Cake
I frequently find myself wanting to bake something, or even needing to bake something for a party or such, and then of course, not having the right ingredients around. (I actually prepare myself constantly against this horrible scenario–perusing specialty baking stores for rose water, non-pareils, anise oil, or any other thing I just may need at any given time.) At these times, baking falls back to fanning the pages of my favorite baking books just to see what I could possibly make that would still be a little interesting, new, and fun. This recipe, the original title of which is “Mrs. Chubb’s Nut Cake” did not stick out because of it’s title. In fact, the title is not a great description of what it is, and had I not been looking carefully at ingredient lists, I probably would have skipped on by it. But, it had the good fortune of my pantry being completely ready for it, so I went ahead and baked it for a friend gathering. So glad. It’s a beautiful winter cake, nuanced by the nutmeg and the cloves, with the hint of lemon and the unique texture of the almond flour. I loved that when one of my friends asked what I had been up to this year, and I replied, “not much,” his response was, “whatever! You made that cake!” The small triumphs 🙂  This recipe comes from the Brass Sister’s Heirloom Baking with the Brass Sisters, a truly sensational baking book. I served this with a homemade raspberry jam.

Spiced Lemon Almond Cake

1 c. almond flour (the original recipe has you pulse your own almonds with a little of the sugar to make your own flour, but it’s easy to buy almond meal these days, so I did)
1 c. sugar
2 c. flour
1 t. baking powder
1 t. salt
1/4 t. nutmeg
1/8 t. cloves
1 c. butter
4 eggs, separated
3 t. grated lemon zest
4 T. lemon juice
1/2 t. lemon extract
3/4 c. milk

For the topping
3 T. untoasted slivered almonds
3 T. clear sanding sugar

Set the oven in the middle position. Preheat the oven to 350 degrees. Cut a parchment paper or wax paper liner to fit the bottom of a 10-inch round tube pan. Coat the pan with vegetable spray. Insert the liner, spray again, and dust with flour.

To make the cake, sift the flour, baking powder, salt, nutmeg, and cloves.

Cream the butter and sugar in the bowl of a standing mixer fitted with the paddle attachment. Add egg yolks, 2 at a time. Add lemon zest, lemon juice, lemon extract, and vanilla, and mix to combine. Add sifted dry ingredients alternately with milk, mixing after each addition until completely blended. Fold in almond flour.

Place egg whites in another bowl of standing mixer fitted with the whisk attachment. Beat until egg whites hold a firm peak. Fold egg whites into batter.

To add the topping: Place batter in tube pan. Sprinkle almonds and sanding sugar on top of batter. Bake 50-55 minutes, or until tester inserted into cake comes out dry. Cool on rack completely before turning out of pan. Store loosely wrapped in wax paper at room temperature. I recommend that you serve this cake with berry preserves!

Chocolate Thumbprint with Salty Caramel

Chocolate Thumbprint with Caramel
Here’s one of a few new favorites from Christmas this year. Actually, I should correct that to say that this was the absolute favorite of my daughter Lucy and two or three others who sampled the whole array. I loved that it kept it’s shape perfectly, and showcased both the pretty sparkling sugar and the caramel. This little cookie is perfect for entertaining or traveling, since it’s stiff enough to hold its shape. It’s also unique and pretty and very tempting! This recipe comes from the December edition of Sunset magazine. Note: this isn’t the easiest caramel recipe to work with, so if you’ve never made caramel before, you might want to use pre-made caramels instead.

Chocolate Thumbprint with Salty Caramel

COOKIES
1 c. flour
Generous 1/2 c. unsweetened cocoa powder
1/4 t. salt
1/2 c. unsalted butter, at room temperature
2/3 c. granulated sugar
1 large egg yolk
1 T. heavy whipping cream
1 t. vanilla extract
1/2 c. sparkling sugar or powdered sugar for rolling, or just leave plain
CARAMEL*
1 c. granulated sugar
6 T. unsalted butter, cut into tbsp.-size chunks
1/2 c. heavy cream
1/4 t. fine sea salt, plus about 1/2 tsp. for sprinkling
1. Make cookies: Preheat oven to 350°. Sift flour, cocoa powder, and salt into a bowl. In another bowl with a mixer on medium speed, beat butter and granulated sugar until pale and fluffy. Reduce speed to low and add egg yolk, cream, and vanilla. Gradually beat in flour mixture.

2. Scoop dough into rounded 1-tsp. portions and roll into balls, then roll balls in sparkling or powdered sugar to coat. Place 2 in. apart on parchment paper-lined baking sheets. With end of a thick-handled wooden spoon, gently press an indentation into center of each cookie. Bake until cookies are just set, about 10 minutes. (The depressions tend to fill in a bit as they bake, so as soon as they’re out of the oven, give them another press with the spoon if necessary.) Slide parchment with cookies onto cooling racks and let cool. If you’ve used powdered sugar, sift a little more onto the cookies.

3. Make caramel: Put granulated sugar in a large nonstick frying pan; spread evenly. Heat over medium-high heat, stirring constantly with a wooden spoon. Sugar will form clumps but eventually will melt and turn into a dark, amber-colored liquid, about 6 minutes. As soon as it’s liquefied, reduce heat to medium-low. Add butter and stir until incorporated. Stirring constantly, drizzle in cream. Boil 1 minute, stirring, then remove from heat and stir in 1/4 tsp. sea salt. Scrape into a bowl and let cool completely.

4. Assemble cookies: Spoon about 1/4 tsp. caramel into each cookie, then sprinkle with a few grains of sea salt.

*You’ll have more caramel than you need, but that’s never a bad thing–it’s great on ice cream. Don’t be tempted to cook a half-batch of caramel, as it won’t cook right and will seize up.

Make ahead: Caramel, up to 5 days, chilled (let soften at room temperature before spooning into cookies). Baked cookies, up to 1 week, chilled airtight.

Christmas Cookies & Candies

Sometimes I feel like I’m hosting cookie tryouts all year long to discover the perfect holiday cookies. But, inevitably, the bulk of trial and error happens in December, as I try and get the right colors and flavors in little boxes that we give to family and friends. Over the last ten or so years, the following cookies and candies have become my favorite, both for variety of taste and appearance, although I try plenty of new ones every year and I already have some I’m excited to post as soon as I get them photographed. Here are some great crowd pleasers! Merry Christmas!
IMG_7911

Cookies
White Christmas Dream Drops
Mint Chocolate-Covered Cookies
Brown Sugar Rugelach
Peanut Butter Toffee Cookies
Pink & White Pinwheels
White Chocolate + Citrus Cookies
Chocolate Crinkle Cookies
Mexican Wedding Cookies
Ginger Spice Cookies

IMG_8313
Candies
Peanut Brittle
Favorite Caramels
Egg Nog Fudge
Candied Orange and Hazelnut Bark

Christmas box

Let the festivities begin!


Pink and White Pinwheels

Pink and White Pinwheels
These pretty and simple little cookies were the perfect addition of color and shape for our Christmas cookie collection last year. Planning to make them again this year! This recipe is a slight adaptation from Heirloom Baking with the Brass Sisters, where this cookie was originally a chocolate and vanilla pinwheel (you can make it chocolate by adding 2 oz. melted bitter chocolate to one-half of the dough, instead of red food dye.) Happy baking!

Pink and White Pinwheels 

2 c. all-purpose flour
1 t. baking powder
1/4 t. salt
2/3 c. unsalted butter
1 c. sugar
1 egg
1 t. vanilla extract
red food dye

Sift the flour, baking powder, and salt together and set aside.

In a mixer with a paddle attachment cream the butter well; then add the sugar and continue creaming until light and fluffy. Add the egg and then the vanilla.

On the low setting, add the dry ingredients and mix just until combined. Divide the dough in half and return half the dough to the mixer. Add a couple drops of red dye and mix to combine. Wrap dough in wax paper and chill both halves of dough 1 hour, or until firm enough to roll.

Roll red dough between 2 sheets of wax paper into a 12-inch by 8-inch rectangle. Repeat for vanilla dough. Remove top sheets of wax paper and invert vanilla dough onto red dough. Remove remaining wax paper. Roll both doughs together, jelly-roll style. Wrap in wax paper and refrigerate at least 3 hours (or freeze 1 hour) until firm.

Preheat the oven to 375 degrees F. Cover a baking sheet with foil, shiny side up. Coat the foil with vegetable spray or use a silicone liner.

Butter a sheet pan. Unwrap the roll and cut into 1/4-inch slices. Place them 1 1/2 inches apart on the sheet pan and bake for 12-15 minutes, or until edges just begin to brown. Coll on a rack. Store between sheets of wax paper in a covered tin.

Apple Cranberry Cake

Apple Cranberry Cake

This cake is so fascinating. It’s almost too tart for my taste, and yet I’ve made it three times now in the last three weeks, and it’s been gone before nightfall. My kids have somehow equated it with the sour spray they get at the summer snow cone stands, and they have just used big ole spoons to work their way through it. And, as mentioned previously, I’m still working on the bags of cranberries I got a little bit excited about in November, so this may have another reiteration or two before Christmas. Which will just be delightful. This recipe comes from Ina Garten’s How Easy Is That? which is a really delightful book for the eager, but sometimes stressed out, hostess that I like to be.

Apple Cranberry Cake

12 oz. fresh cranberries, rinsed and picked over for stems
1 Granny Smith apple, peeled, cored, and diced
1/2 c. light brown sugar, lightly packed
1 T. grated orange zest (2 oranges)
1/4 c. freshly squeezed orange juice
1 1/8 t. ground cinnamon, divided
2 extra-large eggs, at room temperature
1 c. plus 1 T. granulated sugar
1/4 lb. (1 stick) unsalted butter, melted and slightly cooled
1 t. pure vanilla extract
1/4 c. sour cream
1 c. all-purpose flour
1/4 t. kosher salt

Preheat the oven to 325 degrees F.

Combine the cranberries, apple, brown sugar, orange zest, orange juice, and 1 teaspoon of the cinnamon in a medium bowl. Set aside.

In the bowl of an electric mixer fitted with the paddle attachment, beat the eggs on medium-high speed for 2 minutes. With the mixer on medium, add 1 cup of the granulated sugar, the butter, vanilla, and sour cream and beat just until combined. On low speed, slowly add the flour and salt.

Pour the fruit mixture evenly into a 10-inch glass pie plate. Pour the batter over the fruit, covering it completely. Combine the remaining 1 tablespoon of granulated sugar and 1/8 teaspoon of cinnamon and sprinkle it over the batter. Bake for 55 to 60 minutes, until a toothpick inserted in the middle of the cake comes out clean and the fruit is bubbling around the edges. Serve warm or at room temperature.

Apple Cran Eli

This little guy gobbled my photo shoot up in minutes. I really only had one option for my photo. But I loved seeing him go at it!

Lemon Chess Pie

Lemon Chess Pie
For Thanksgiving, I did a grand sweep of all my favorite pies (eight in total!), first, because it was Thanksgiving, and second, because I just wanted to remember them all. Well, I remembered that this is my favorite. Not too lemony, but sweet and custardy with the bright citrus flavor. It’s just lovely. In fact, I was so sad it was gone by Friday, that I made another one Saturday. Lucy and I just ate the last bites. Hopefully, we won’t wait until Thanksgiving next year to have this again. This simple pie is perfect for any night or for company, and it comes from America’s Test Kitchen Annual 2011, but has been reprinted in some of their other publications as well.

Lemon Chess Pie

  • 5 large eggs
  • 1 3/4 c. plus 1 t. sugar
  • 1 T. grated lemon zest and 3 T. juice from 1 lemon
  • 2 T. cornmeal
  • 1/4 t. salt
  • 8 T. (1 stick) unsalted butter, melted and cooled slightly
  • 1 (9-inch) pie shell, chilled (try the cream cheese pie crust if you don’t have a recipe you like!)
1. MAKE FILLING: Whisk eggs in large bowl until smooth. Slowly whisk in 1¾ cups sugar, lemon zest and juice, cornmeal, and salt until -combined. Whisk in butter.2. BAKE CRUST: Poke pie shell all over with fork. Refrigerate 40 minutes, then freeze 20 minutes. Adjust oven rack to upper-middle position and heat oven to 450 degrees. Bake shell until small bubbles appear and surface begins to look dry, about 8 minutes. Remove from oven. Reduce oven temperature to 325 degrees.

3. BAKE PIE: Whisk filling briefly to recombine. Scrape filling into prepared pie shell and bake until surface is light brown and center jiggles slightly when shaken, 35 to 40 minutes. Sprinkle with remaining teaspoon sugar. Cool -completely on wire rack, about 4 hours. Serve. (Pie can be refrigerated, covered with plastic wrap, for 2 days.)

Cranberry Coconut Macaroons

Cranberry Coconut Macaroon
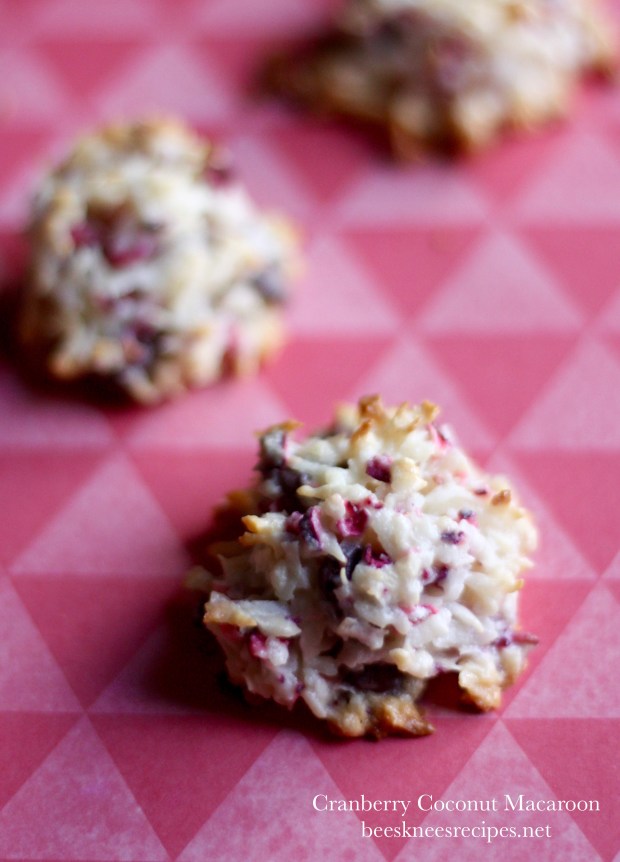
I was very excited to make this recipe, because I may or may not have purchased quite a few bags of cranberries in all my excitement about Thanksgiving. This recipe is lovely. Not the most loved by all of my children, but I loved it, and I am so excited to include it in a Christmas cookie collection. There is a sad story to this recipe, though. I think the original recipe for these cookies (which was on the backside of a cranberry package) must have ended up in the garbage. I’m still looking (and hoping) that it’s somehow just misplaced, and sadly, I can’t seem to locate anything quite like it on the internet. So, I’m posting this from memory, though I’m sure there might be a tweak or two after I make it again. So, consider this a draft, hopefully not too rough.

Cranberry Coconut Macaroons

12 oz. bag sweetened, flaked coconut
3 T. flour (this is the contested ingredient! I believe it’s supposed to be in the cookie, but now that I’m perusing the internet, I’m doubting myself! I’ll just have to make them again to make sure!)
1 can sweetened condensed milk
1 c. fresh or frozen cranberries, finely chopped (or pulsed in a food processor)
1/2 c. chocolate chips

Preheat oven to 325 degrees. Line two baking sheets with parchment paper.

In a large bowl, combine cranberries, flour, and coconut, then stir in the sweetened condensed milk. Once it’s well combined, add the chocolate chips.

Using a teaspoon cookie scoop, drop the cookies onto the prepared sheet. Bake for 20-25 minutes, rotating the sheets to promote even browning. Cool on a rack before serving.

Flaky Cream Cheese Pie Dough

This recipe was recommended to me by my fabulous baker/friend Claudine, who described it as “no-fail.” I totally agree! This recipe is from Rose Levy Berenbaum’s The Pie and Pastry Bible. Note: as you will soon see, Berenbaum is extremely particular and I’m sure her attention to detail yields an amazing crust. I, however, simply use her recipe by putting all the ingredients in my food processor, blending the dry, adding the butter, then the liquid, make into a disk, refrigerate for 1/2 hour, then proceed with my recipes. Maybe someday, I’ll be a little more of a perfectionist . .
Flaky Cream Cheese Pie Dough

[Pastry for a 9-inch pie shell or a 9 1/2- or 10- by 1-inch tart shell]

  • 6 T. unsalted butter, cold
  • 1 c. + 1 T. pastry flour or 1 c. (dip and sweep method) bleached all-purpose flour
  • 1/8 t. salt (for savory recipes, use 1 1/2 times the salt)
  • 1/8 t. baking powder
  • 1/4 c. cream cheese, cold
  • 1 T. ice water
  • 1 1/2 t. cider vinegar

Food processor method:

  1. Cut the butter into small (about 3/4-inch) cubes. Wrap it in plastic wrap and freeze it until frozen solid, at least 30 minutes. Place the flour, salt, and baking powder in a reclosable gallon-size freezer bag and freeze for at least 30 minutes.
  2. Place the flour mixture in a food processor with the metal blade and process for a few seconds to combine. Set the bag aside.
  3. Cut the cream cheese into 3 or 4 pieces and add it to the flour. Process for about 20 seconds or until the mixture resembles coarse meal. Add the frozen butter cubes and pulse until none of the butter is larger than the size of a pea. (Toss with a fork to see it better.) Remove the cover and add the water and vinegar. Pulse until most of the butter is reduced to the size of small peas. The mixture will be in particles and will not hold together. Spoon it into the plastic bag. (For a double-crust pie, it is easiest to divide the mixture in half at this point.)
  4. Holding both ends of the bag opening with your fingers, knead the mixture by alternately pressing it, from the outside of the bag with the knuckles and heels of your hands until the mixture holds together in one piece and feels slightly stretchy when pulled.
  5. Wrap the dough with the plastic wrap, flatten it into a disc (or discs) and refrigerate for at least 45 minutes, preferably overnight. (For a pie shell and lattice, divide it in a ratio of two thirds:one third — use about 9.5 ounces for the shell and the rest for the lattice, flattening the smaller part into a rectangle.)

If you want to make it by hand, please see Epicurious for more directions.

Pear Custard Pie

Pear Custard Pie 2

I clipped this recipe a few years ago from Saveur, and it took me a little while to get around to making it (well, it was actually my sweet neighbor giving me a basket of her pears that got me around to making it!) and now I’ve made it twice in the last two weeks, and I am planning to add it to the Thanksgiving day line-up. Pears and custard are heaven. This lovely recipe combine the two for a sweet, subtle flavor that I love. And notice how simple! This recipe comes from the September 2013 Saveur.


Pear Custard Pie
Flour, for dusting, plus 3 T.
12 recipe Buttery Pie Dough (if you don’t have one you like, try the one below)
4 large ripe Bartlett pears, peeled, cored, and thinly sliced
34 c. sugar
1/4 c. flour
1 c. heavy cream
1 t. clear vanilla [my addition] or vanilla bean paste

On a lightly floured surface, roll dough into a 12″ round. Fit into a 9″ pie plate. Trim edges and crimp; chill for 30 minutes.

Heat oven to 400°. Combine the sugar and flour in a small bowl. Fan half the pears evenly over dough. Sprinkle half of the sugar and flour mixture over pears and drizzle with half the cream. Repeat with remaining pears, sugar, flour, and cream. [I’ve also mixed the sugar, flour, cream in a bowl and poured over the pears, which I believe makes it even creamier.] Bake until crust is golden and filling is set, about 1 hour. Let cool completely before serving.