Zucchini Country Bread

Zucchini Country Bread
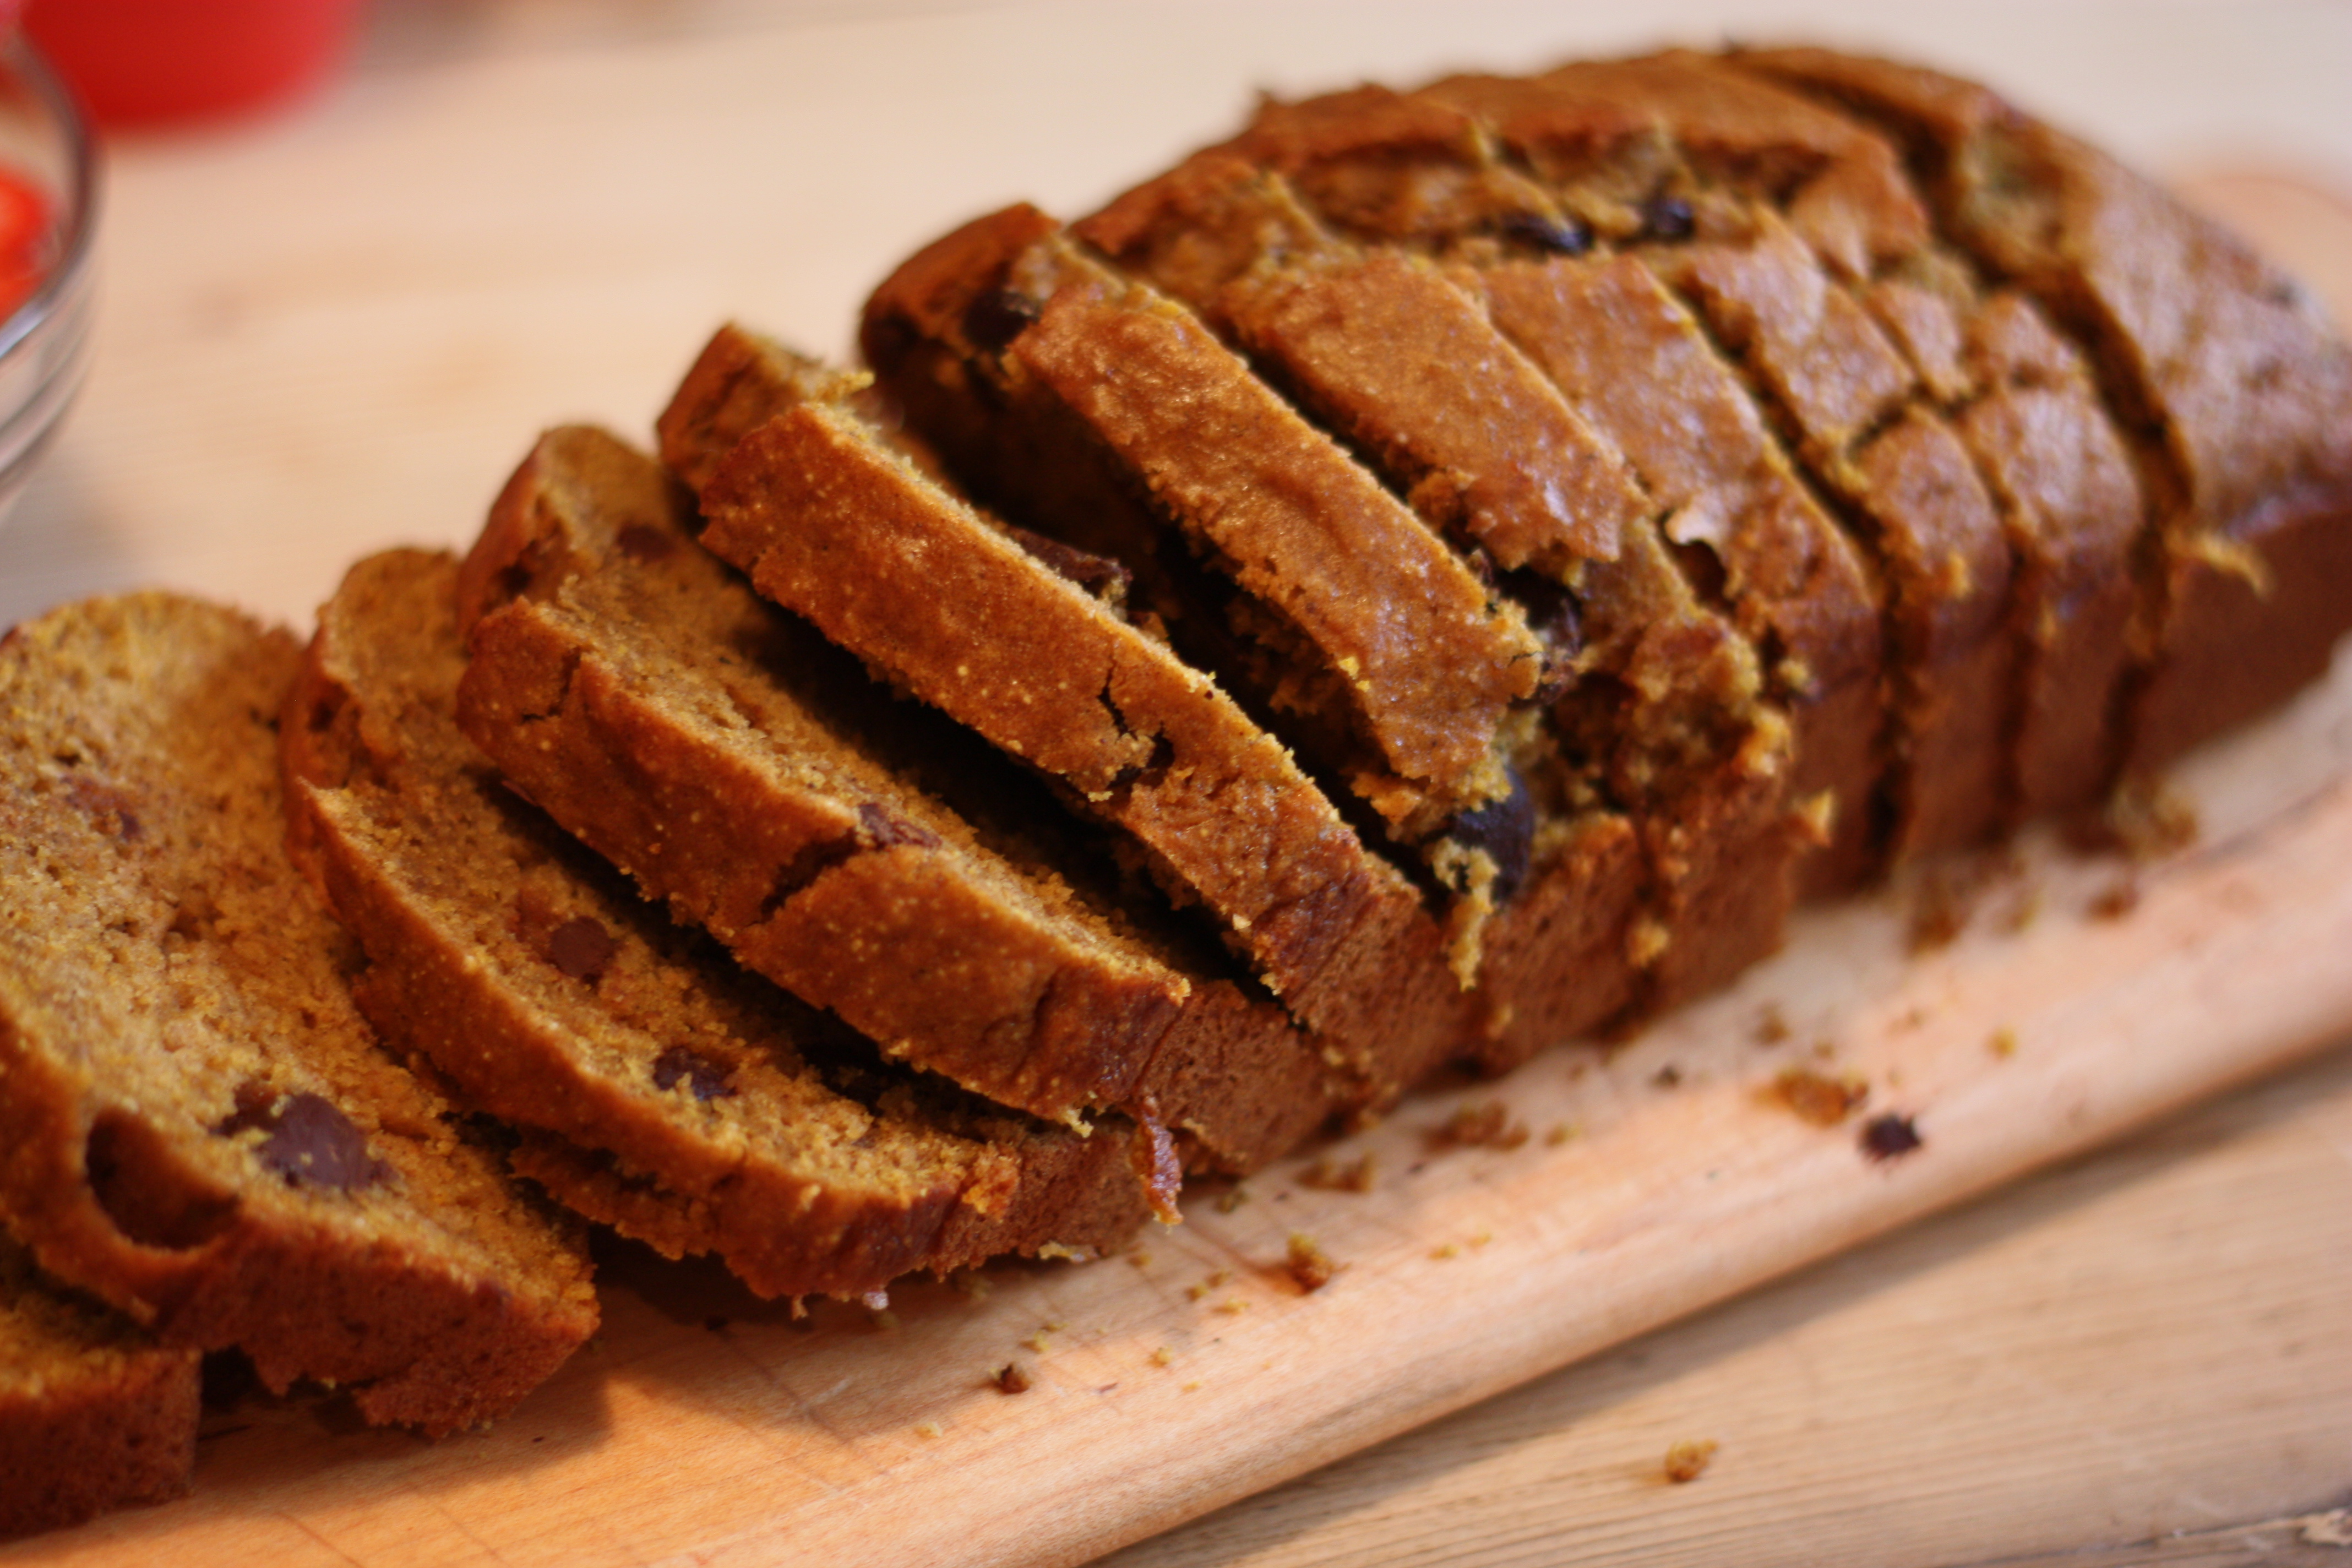
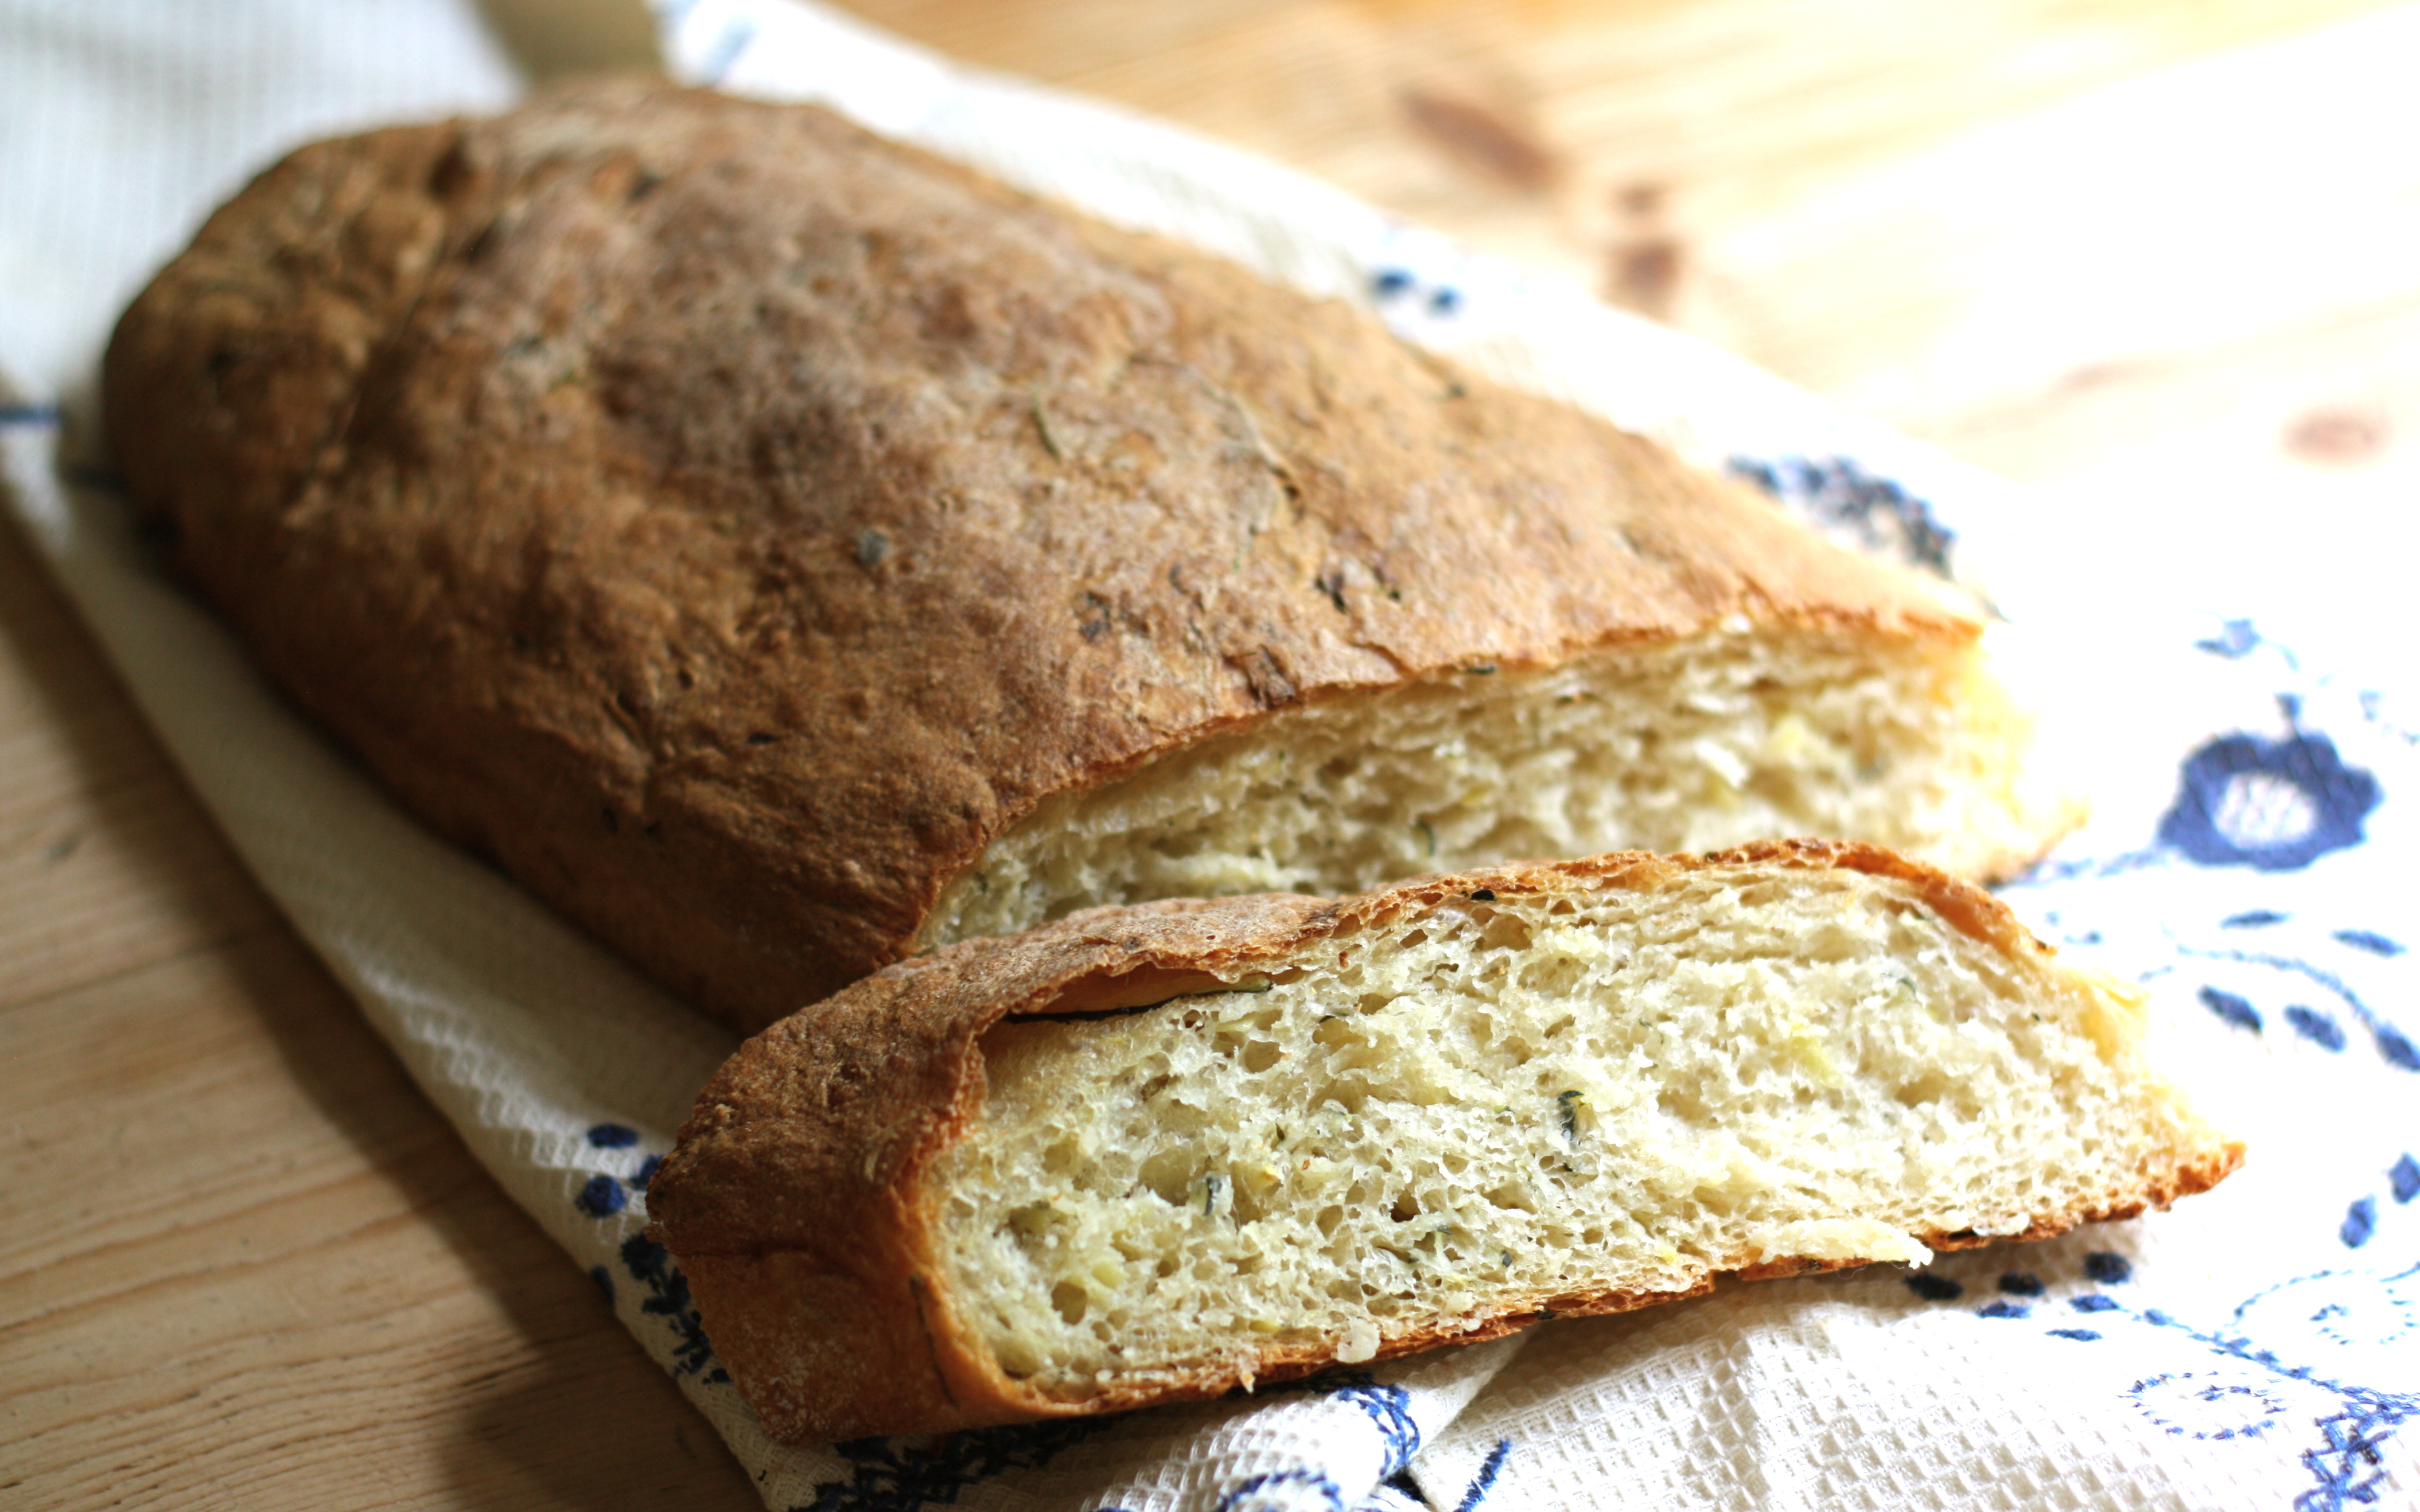
I’ve been on this kick to bake bread daily (which means it happens about 3-4 times a week, because anything I try to do daily usually only happens 3-4 times a week), so I’ve been going through my bread cookbooks. This recipe comes out of Beth Hensperger’s Bread for All Seasons, which I recently gave to my sister, and I remembered how much I love this book. I was so happy to find a recipe that uses zucchini but isn’t sweet, just to give me another option for all the zucchini that is starting to appear.  This loaf is great to accompany salad or soup, or we had it with a homemade boursin (goat cheese with a little minced garlic, chopped basil, parsley, and rosemary), and an array of fresh fruits and vegetables for dinner. Perfect summer meal. Note that one batch will make two long loaves.

Zucchini Country Bread

1 T. active dry yeast
pinch of sugar
5 to 5 1/2 c. unbleached all-purpose flour (I substituted 1 c. whole wheat)
1 1/4 c. warm water
4 or 5 medium zucchini (or one baseball-sized one!)
1 T. olive oil
1 T. salt

In a standing mixer, sprinkle the yeast, sugar and 1 1/4 cups of the flour over the warm water. Beat well until smooth and creamy, about 1 minute. Cover loosely with plastic wrap and let rise at room temperature until bubbly, about 1 hour. Meanwhile, coarsely grate the zucchini to make 2 packed cups and drain in a colander set over a plate (with a little sprinkle of salt) for 30-60 minutes.

Add 1/2 c. of the remaining flour, oil, salt, and grated squash, and beat until smooth, about 2 minutes. Add the remaining flour, 1/2 c. at a time, until a soft, sticky dough is formed that just clears the sides of the bowl.

Turn out onto a lightly floured work surface and knead vigorously until smooth and springy, about 2 minutes, adding 1 T. flour at a time, if necessary. The dough will be soft and smooth. Place in a greased deep container, turn once to coat the top, and cover with plastic wrap. Let rise until doubled in bulk, 1 1/2 to 2 hours.

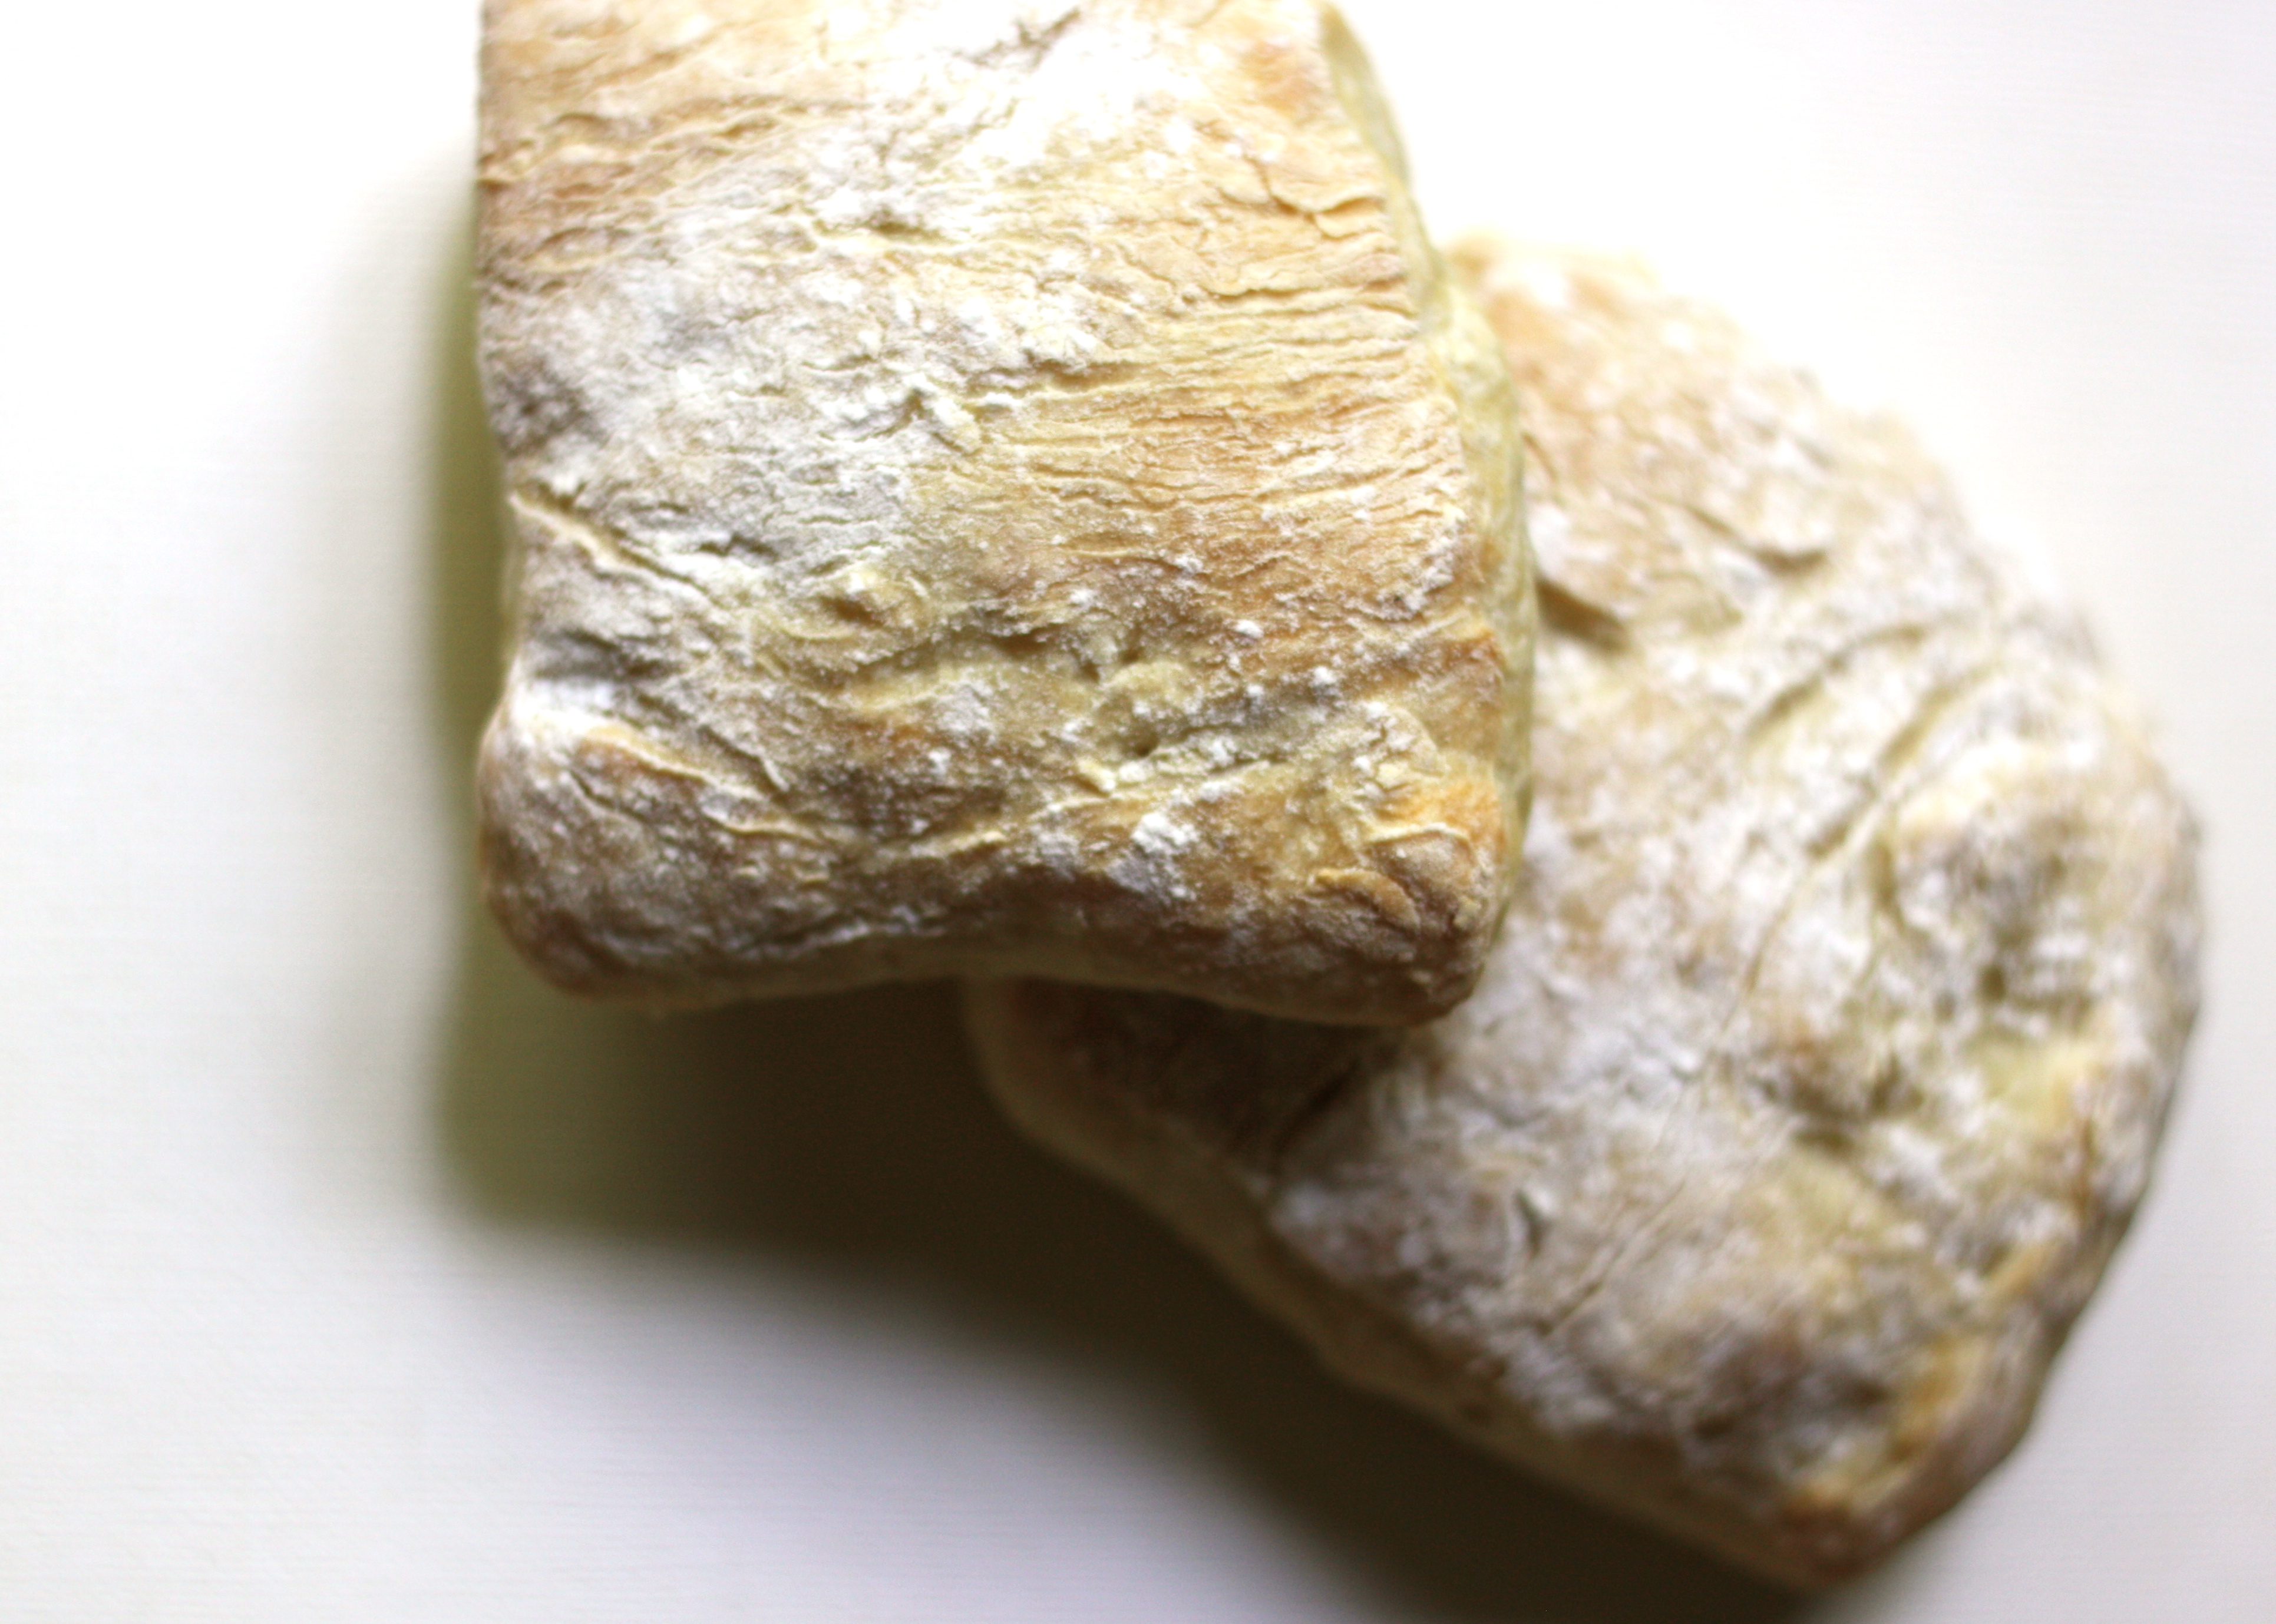
Turn the dough onto the work surface and divide into 2 equal portions. Form each portion into a 10-inch cylindrical log with tapered ends, dusting the entire round of dough with a bit of flour, and place seam side down on a greased or parchment-lined baking sheet. Cover loosely with plastic wrap and let rise at room temperature, about 45 minutes. Meanwhile, preheat the oven to 425 degrees.

With kitchen shears, snip the top of each loaf on the diagonal 3 or 4 times. Brush the top of the loaf with olive oil, if desired. Place the loaves in the center of the preheated oven and bake 40-45 minutes or until crusty, brown, and sound hollow when tapped. Remove to a rack to cool completely.

Chewy Italian Rolls (Ciabatta)

Chewy Italian NewThere’s these rolls at Costco, with the La Brea Bakery label, that are so versatile, and such a perfect star for summer dinners: tomato, basil, fresh mozzarella and balsamic vinegar sandwiches, BLTs, grilled veggie paninis, grilled cheese with cherry jam and basil, etc. But, I hate going to Costco just to buy these rolls (because I can never leave without spending at least $50, even though my kids emerge happier than when they went in), so I was delighted to see this recipe in a King Arthur Flour magazine. And, they are totally great–not quite the same texture as La Brea, but they have their own great texture and a way shorter list of ingredients! Plus, I used half whole wheat–my miracle cure for the great ail of the American diet. Note that you have to start the biga, or starter, a day in advance, which is a great thing to do right as your cleaning up dinner or just before bed. It feels so good to start a new day with some bread already in the making!  Plus, rolls are the perfect summer bread, because they don’t have to bake nearly as long as a loaf, so I can turn my oven off quicker!

Chewy Italian Rolls

For the Biga

  • 1 1/2 c. flour
  • 1/4 c. whole wheat flour
  • 1 c. water
  • 1/8 t. instant yeast

For the Dough

  • biga (from above)
  • 2 1/2 c. flour (I substituted half of this amount with whole wheat)
  • 1/2 c. water
  • 2 t. salt
  • 1/2 t. instant yeast

To make the biga: Mix all of the ingredients until well blended. Cover the bowl, and let rest at room temperature for 12 to 20 hours, until the mixture is very bubbly.

To make the dough: Mix the biga with the remaining ingredients for 2 to 4 minutes, using an electric mixer set on slow speed. Increase the mixer speed to medium, and mix for about 4 minutes; the dough will be soft and slightly sticky. Add additional water or flour if necessary.

Let the dough rise in a greased bowl, covered, for 1 to 2 hours, until very puffy.

Turn the dough out onto a well-floured surface, and shape it into a 6″ x 12″ rectangle. Using a bench knife or pizza wheel, cut out eight 3″ square rolls. Place the rolls, floured side up, onto parchment paper. Let them rise for about 45 minutes, lightly covered, until they’re puffy.

Place a baking stone in the top third of your oven, and preheat the oven to 450°F.

Bake the rolls for 13 to 15 minutes, until they’re golden brown. Remove them from the oven, and cool on a rack.

Yield: 8 rolls.

Chewy Italian NEW 2

So great for sandwiches and so easy to shape!

Real Burger Buns

Hamburger Bun GourmetI just really, really dislike store-bought burger buns. I think there is nothing about them that is appealing, except that they have a nice, uniform shape. But they have no flavor, and their ingredient list is incomprehensible. I just would rather avoid them altogether. 

Of course, that puts me up to a lot of work, but honestly, when the burger tastes so much better, I’m willing to do it. This is another recipe that I like (my other favorite has mashed potatoes, so this one is a little bit easier). I am also finding that bread recipes with cream instead of butter have a great crumb, and it’s a little less time-intensive as well. This batch made up about 12 for us, and they were good-sized. The recipe comes from a Gourmet Grilling magazine, and it can also be used for hot dog buns, if you like! Just shape into cylinders and cut. 

Real Burger Buns 

  • 1 1/4 c. whole milk
  • 1 c. heavy cream
  • 1/4 c. warm water (105—115°F)
  • 1 (1/4-oz) package active dry yeast
  • 1/4 c. sugar
  • 5 c. all-purpose flour (can substitute 2-3 cups with whole wheat)
  • 2 t. salt

For the top

  • 1 large egg, lightly beaten
  • 2 t. sesame seeds

Bring milk and cream to a bare simmer in a small saucepan over medium heat. Cool mixture to 105 to 115°F. [I just heated them in the microwave for about 45 seconds.]

Meanwhile, stir together warm water and yeast in mixer bowl and let stand until foamy, about 5 minutes. (If mixture doesn’t foam, start over with new yeast.)

Add warm milk mixture, sugar, flour, and salt to yeast mixture and mix at low speed, scraping down side of bowl as necessary, until flour is incorporated. Increase speed to medium and beat 6 minutes. (Dough will be sticky.)

Transfer dough to a lightly oiled large bowl and turn to coat with oil. Cover with a kitchen towel (not terry cloth) and let rise in a draft-free place at warm room temperature until doubled, about 2 hours.

To make hamburger buns: 
Butter 2 large baking sheets. Punch down dough, then roll out on a floured surface with a floured rolling pin into a 14-inch round (about 1/2 inch thick). Cut out as many rounds as possible with floured cutter, arranging 3 inches apart on baking sheets. Gather and reroll scraps once, then cut out more rounds. [If you just cut, the final bun looks like a biscuit. I like to cut with the circle cutter, and then wrap the sides under–like you are pinching all the sides into the bottom of the bun–in order to get a dome on the roll.]

Loosely cover buns with oiled plastic wrap and let rise in a draft-free place at warm room temperature until they hold a finger mark when gently pressed, 1 1/2 to 2 hours.

Preheat oven to 375°F with racks in upper and lower thirds.

Brush buns with some of egg and sprinkle with sesame seeds. Bake, switching position of sheets halfway through, until tops are golden and undersides are golden-brown and sound hollow when tapped, 20 to 25 minutes. Transfer to racks to cool completely.

Hamburger Bun G 2

Chocolate-Coconut Pound Cake

Chocolate Coconut BreadI had this recipe clipped, and I finally tried it two weeks ago. Though not nearly the hit that its companion of the afternoon was (French Lemon Yogurt Cake–I’ll be posting that recipe soon!), I love that it uses coconut oil and has quite a nice, tender crumb, and that the texture even becomes silky the next day. Definitely keeps well, and freezes well, too. You’ll also note by my photo that I didn’t take the time to put in parchment, and it was fine. (I’m also posting it by request. Hope you enjoy it, Mom!). Taken from Bon Appetit, March 2014.  

Chocolate-Coconut Pound Cake

  • 1/4 c. unsalted butter, plus more
  • 1 1/2 c. all-purpose flour [I used whole wheat]
  • 1/2 c. unsweetened cocoa powder
  • 1 t. kosher salt
  • 3/4 t. baking powder
  • 1/2 c. virgin coconut oil, room temperature
  • 1 1/2 c. plus 1 tablespoon sugar (I cut this down to just 1 c.)
  • 3 large eggs
  • 1 t. vanilla extract
  • 2/3 c. buttermilk
  • 1/4 c. unsweetened coconut flakes

Preheat oven to 325°F. Butter an 8×4″ loaf pan; line with parchment paper, leaving a generous overhang on long sides. Whisk flour, cocoa powder, salt, and baking powder in a medium bowl; set aside.

Using an electric mixer on medium-high speed, beat oil, 1/4 c. butter, and 1 1/2 c. sugar until pale and fluffy, 5–7 minutes. Add eggs one at a time, beating to blend between additions; beat until mixture is very light and doubled in volume, 5–8 minutes. Add vanilla.

Reduce mixer speed to low and add dry ingredients in 3 additions, alternating with buttermilk in 2 additions, beginning and ending with dry ingredients (do not overmix; it will cause cake to buckle and split). Scrape batter into prepared pan and run a spatula through the center, creating a canal. Sprinkle with coconut and remaining 1 tablespoon sugar.

Bake cake, tenting with foil if coconut browns too much before cake is done (it should be very dark and toasted), until a tester inserted into the center comes out clean, 70–80 minutes. Transfer pan to a wire rack; let cake cool in pan 20 minutes before turning out.

Rosemary Raisin Crackers

Rosemary Raisin CrackersI’m obsessed with Trader Joe’s Rosemary Raisin Crisps, but Trader Joe’s isn’t very close to my home, so I’m committed to figuring this recipe out myself. This is my first attempt, and it’s good, although not an exact likeness (not quite as dry and has wheat germ–tastes a little more like a graham cracker, and also wasn’t sliced in squares). The flavor is so similar, though, that I have to write this down, so I remember it, even if I continue tweaking it! 

Rosemary Raisin Crackers


  • 1 1/4 c. whole-wheat flour, plus more for dusting
  • 1/2 c. toasted wheat germ
  • 1/4 c. sunflower seeds
  • 1/4 c. raisins, minced
  • 1 T. fresh (or 1 t. dried) rosemary, minced
  • 1/4 c. sugar
  • 1/2 t. baking powder
  • 1/2 t. baking soda
  • 1/2 t. salt
  • 3 T. unsalted butter, cut into pieces
  • 1/2 c. nonfat buttermilk

Preheat oven to 350 degrees. Spray two baking sheets with cooking spray; set aside. In the bowl of a food processor, pulse flour, wheat germ, sugar, sunflower seeds, raisins, rosemary, baking powder, baking soda, and salt (you may also just do this with a whisk, by hand). Add butter; process until mixture resembles coarse meal (or use your fingers and do the same). With machine running, gradually add buttermilk; process until dough comes together and is moist (if doing by hand, switch to a wooden spoon and mix until the dough just comes together, adding a little extra buttermilk, if needed).

Transfer to a lightly floured surface or to a sheet of parchment paper precut to the size of a baking sheet. Allow the dough to rest for 5 minutes. Roll until 1/4 to 1/8 inch thick.

Cut dough into diamonds or rectangles using a pastry knife (or butter knife). Transfer to ungreased baking sheets. Pierce each cracker liberally with a fork. Bake until hard, about 16 minutes. Transfer crackers to a wire rack to cool. Store in an airtight plastic container, at room temperature, up to 1 week.

Not-as-Sweet Pumpkin Bread


Pumpkin Bread less sugarLast time I made pumpkin bread, my mouth was ringing for a bit afterwards. It just had way too much sugar in it. So, since I’m trying to cut sugar in non-conspicuous ways (I’m not against it, but I just don’t think we need to use quite so much of it!), I changed this recipe a bit, hoping it would still be sweet enough that my kids would eat the whole loaf without question. Totally worked. They didn’t suspect a thing, the loaves were beautiful and delicious, and for me, better, because without so much sugar, the cinnamon and the pumpkin tastes were heightened. I wanted to make sure to write this variation down, before I forgot it. 

Not-as-Sweet Pumpkin Bread

2 1/2 c. all-purpose flour (the original calls for only all-purpose, which works great, of course, too)
1 c. whole wheat flour
2 t. ground cinnamon
1 t. nutmeg
1 t. salt
1 t. baking soda
4 eggs
1/2 c. white sugar (the original recipe calls for 1 1/2 c.)
1/2 c. brown sugar
2 c. pumpkin puree
1/2 c. applesauce
1/2 c. canola oil
1/2 c. pecans or walnuts (optional)
1 c. semi-sweet chocolate chips

Preheat the oven to 350 degrees and grease two loaf pans (Pam works fine here).

In a large bowl, combine the dry ingredients: flours, cinnamon, nutmeg, salt and soda. In another bowl (or in a standing mixer), beat eggs and sugars for one minute, then add the oil, combine, and then the pumpkin. Stir the dry ingredients into the pumpkin mixture until combined, then add nuts and chocolate chips, if using.

Spoon the batter evenly into the two pans, and then bake for 60-70 minutes or until a toothpick comes out clean. Remove to a rack, and let the loaf cool for another 20 minutes or so before slicing.

Yields 2 loaves.

Healthy & Happy Pancakes

I was pleasantly surprised at the amazing reception these pancakes have had at my house. Usually my kids can sniff out “healthy” food before they try it, and the idea of something being good for them is so completely revolting, that they then won’t eat a bite. Luckily, these pancakes have a very normal appearance, and my kids reported that they LOVED them. I was so glad. We have had them four times in the last two weeks! I’ve intentionally doubled the recipe, and then refrigerated the leftover batter, because they are just as delicious cooked up the next day. This recipe comes from The Frog Commissary Cookbook

Healthy & Happy Pancakes

1/2 c. shredded, sweetened coconut (you can pulse this as well, for a finer texture)
1 c. whole wheat flour
1 c. old fashioned oats (I’ve blended these for a few seconds and left them whole–depends what type of texture you want!)
1 T. baking powder
1 t. salt
1/3 c. brown sugar
1 T. corn oil
2 c. milk
1 egg
1 t. vanilla
3/4 c. sunflower seeds or chopped pecans (optional–my kids didn’t love these, so I left them out)

Whisk together the coconut, wheat flour, oats, baking powder, salt, and brown sugar in a large bowl. In a small bowl, combine the milk, egg, vanilla, and oil. Make a well in the dry ingredients, and add the wet ingredients. Stir until just combined, and cook on a hot griddle (375 degrees) until browned on both sides.

Serving suggestions: Honey butter (terrific! We love just the honey butter with these), sauteed peaches or apples, or maple syrup.

Golden Pull-Apart Dinner Rolls

KAFs Photo!

KAFs Photo!

A new favorite roll recipe! This recipe appealed to me for Thanksgiving dinner, because it doesn’t have nearly as much butter as many other roll recipes, and since Thanksgiving is quite the heavy meal anyway, I thought it would be a good option. I loved it! It was such a good suggestion from the King Arthur Flour site, I’ve gone back many times since looking for other great recipes. I’ll be posting some of those soon!

Golden Pull Apart Dinner Rolls

  • 3 1/2 c. Unbleached All-Purpose Flour
  • 2 t. instant yeast
  • 2 T. potato flour or 1/4 cup instant potato flakes
  • 3 T.  nonfat dry milk
  • 2 T. sugar
  • 1 1/2 t. salt
  • 4 T. soft butter
  • 2/3 c. lukewarm water
  • 1/2 c. lukewarm milk
  • 2 T. melted butter, for topping

1) Combine all of the dough ingredients in a large bowl, and mix and knead — using your hands, a stand mixer, or a bread machine set on the dough cycle — to make a soft, smooth dough.

2) Place the dough in a lightly greased container — an 8-cup measure works well here. Cover the container, and allow the dough to rise for 60 to 90 minutes, until it’s just about doubled in bulk.

3) Gently deflate the dough, and transfer it to a lightly greased work surface.

4) Divide the dough into 16 equal pieces, by dividing in half, then in halves again, etc. Round each piece into a smooth ball.

5) Lightly grease two 8″ round cake pans. Space 8 buns in each pan. Can you use 9″ round cake pans, or a 9″ x 13″ pan? Sure; the buns just won’t nestle together as closely, so their sides will be a bit more baked.

6) Cover the pans, and allow the buns to rise till they’re crowded against one another and quite puffy, about 60 to 90 minutes. Towards the end of the rising time, preheat the oven to 350°F.

7) Uncover the buns, and bake them for 22 to 24 minutes, until they’re golden brown on top and the edges of the center bun spring back lightly when you touch it. An instant-read thermometer inserted into the middle of the center bun should register at least 190°F.

8) Remove the buns from the oven, and brush with the melted butter. After a couple of minutes, turn them out of the pan onto a cooling rack.

Yield: 16 buns.

Yeasted Sweet Cheese Strudel

Cream Cheese Almond BreadI always want to do something special for breakfasts on holiday mornings, and I’ve tried several different recipes, but this year, I was so happy with this strudel bread, I want to remember it for Easter next year. This recipe comes from Beth Hensperger’s Bread for All Seasons, a delightful book, and this bread/pastry was not terribly difficult, but unique and delicious (what I’m trying to say is that it’s actually my favorite thing to eat ever, and if I had no other considerations like health and weight, I would have it every morning). Anyway, for anyone else who’s a big fan of the cream cheese danish, here’s a great recipe for you to try! Note that the dough sits in the refrigerator overnight, so give yourself time in advance. I snapped the above picture, a couple of slices of the danish, which is all that remained in my house after breakfast from four loaves!

Yeasted Sweet Cheese Strudel or  Cream Cheese Braided Danish

2 1/2 t. active dry yeast
1/2 c. sugar
1/2 c. warm water
1/2 c. sour cream
6 T. unsalted butter, at room temperature, cut into pieces
2 eggs
Grated zest of 1 large lemon
1 1/2 t. salt
3 1/4 c. unbleached all-purpose flour (exact measure)

Sweet Cheese Filling
8 oz. fresh goat cheese (not Feta!), at room temperature
8 oz. cream cheese, at room temperature [this time, I actually just used 16 oz. of cream cheese instead of goat cheese, and it was still great]
2/3 c. sugar
1 egg
2 t. pure vanilla extract
Grated zest of 1 large lemon

Brandied Almond Crust
1 egg yolk
1 t. good-quality brandy [or almond extract]
2 T. light brown sugar
1/4 t. ground allspice
1/2 c. slivered or sliced almonds

1. In a small bowl, sprinkle the yeast and a pinch of the sugar over the warm water. Stir to dissolve. Let stand until foamy, about 10 minutes. Warm the sour cream on the stove top or in a microwave to about 105 degrees, then add the butter pieces. Stir to melt.

2. In a standing mixer (or equivalent), combine the remaining sugar, eggs, lemon zest, salt and 1 c. of flour. Add the warm sour cream and yeast mixtures. Beat until smooth, about 1 minute, switching to a wooden spoon as necessary if making by hand. Add the remaining flour, 1/2 c. at a time. The dough will be rather soft and have a silky, translucent quality. Scrape down the sides of the bowl with a spatula. Cover the bowl with 2 layers of greased plastic wrap and let rise in the fridge overnight.

3. The next day, make the sweet cheese filling. With an electric mixer, blend together the cheeses, sugar, egg, vanilla, and lemon zest until smooth and well combined. Cover and refrigerate until needed.

4. Using a large dough scraper, scrape the chilled batter onto a lightly floured work surface. Divide into 3 equal portions. Roll out each portion in to an 8-by-12-inch rectangle, dusting lightly with flour as necessary to prevent sticking. Spread each rectangle with one-third of the sweet cheese filling, leaving a 1/2-inch border around the edges. Starting from a long side, roll up jelly-roll fashion and pinch the seam together to seal. Pinch both ends to seal and tuck them under. Place on a greased or parchment-lined baking sheet, at least 3 inches apart. Using a serrated knife, score each finished cylinder in 5 places across the top, no more than 1/4 inch deep. Cover loosely with plastic wrap and let rise at room temperature until doubled in volume, 45 minutes to 1 hour. Twenty minutes before baking, preheat the oven to 350 degrees.

5. Bake in the center of the preheated oven 10 minutes. Meanwhile, prepare the brandied almond crust. In a small bowl, combine the egg yolk, brandy, brown sugar, and allspice and beat briskly with a whisk. Using a pastry brush, spread the crust mixture gently over the tops of the partially baked strudels. Immediately sprinkle each strudel with one-third of the almonds. Quickly return the pan to the oven and bake until the strudels are golden, sound hollow when tapped, and a cake tester inserted into the center comes out clean, another 15-20 minutes. Using a spatula, carefully transfer the strudels from the baking sheet to a rack to cool completely. Enjoy!

Homemade Naan Bread

Layers of NaanAgain, I was surprised how easy this recipe is. It takes a few hours to raise, but just stirs together and then there isn’t a second raising time, like most breads. Definitely makes a curry better! I got this recipe from the blog, everybodylikessandwiches. (and thanks to that blogger!) Note my alternate way to bake the breads–I really like the result

Naan Bread

(adapted from Mark Bittman’s How to Cook Everything)
2 t. instant yeast
2 T. milk
2 T. yogurt
1 T. sugar
3 c. all-purpose flour
1 c. whole wheat flour
1 egg
1 1/2 c. water
2 t. salt
canola oil, for the bowl
4 T. butter
1 clove garlic, minced
2 T. sesame seeds (black or white)

Stir together the yeast, milk, yogurt and sugar and set aside. In another large bowl, combine the flours, egg, and salt together, mixing well with a wooden spoon. Stir in the yeast mixture until combined and start adding in the water a little at a time until the dough forms into a slightly sticky ball.

Knead the dough for a few seconds right in the bowl until the dough becomes a bit smoother. Add a bit of oil to the bottom of the bowl and roll the dough ball around in it, and around the sides of the bowl. Cover the bowl with a tea towel and let the dough rise until doubled in size, about 2 hours.

Heat oven to 500F and put a baking sheet on the lowest rack. [I heated the broiler instead, with my baking stone about 6 inches away from the broiler}.]

Punch down the dough and then break the dough into 2 balls. Dust your board or table lightly with flour and roll one ball into a snake, then break into 6 small balls. Repeat with the other larger ball of dough until you have 12 smaller balls of dough. Cover with a tea towel and let rest for 10 minutes.

Roll out each ball into an oval shape and add it to the hot baking sheet. Flip the naan bread after 3 minutes. [If you do this under the broiler, like I do, it only takes 90 seconds on the first side, and 60 seconds on the reverse.] The naan is ready when it’s puffed up slightly and is mottled with golden spots. In a small saucepan, melt together the butter and garlic and brush freshly baked naan with the garlic butter and sprinkle with sesame seeds.

Naan1